Settings
Click the Settings button in the left sidebar's rail (gear icon, also in the rail's ⌄ menu). The sidebar switches to the settings sections — grouped under collapsible App, Panels, Data, and System headers — and the Settings tab opens. All settings live on one scrollable page: click a section in the sidebar to jump straight to it, and the sidebar highlights the section you're reading as you scroll.
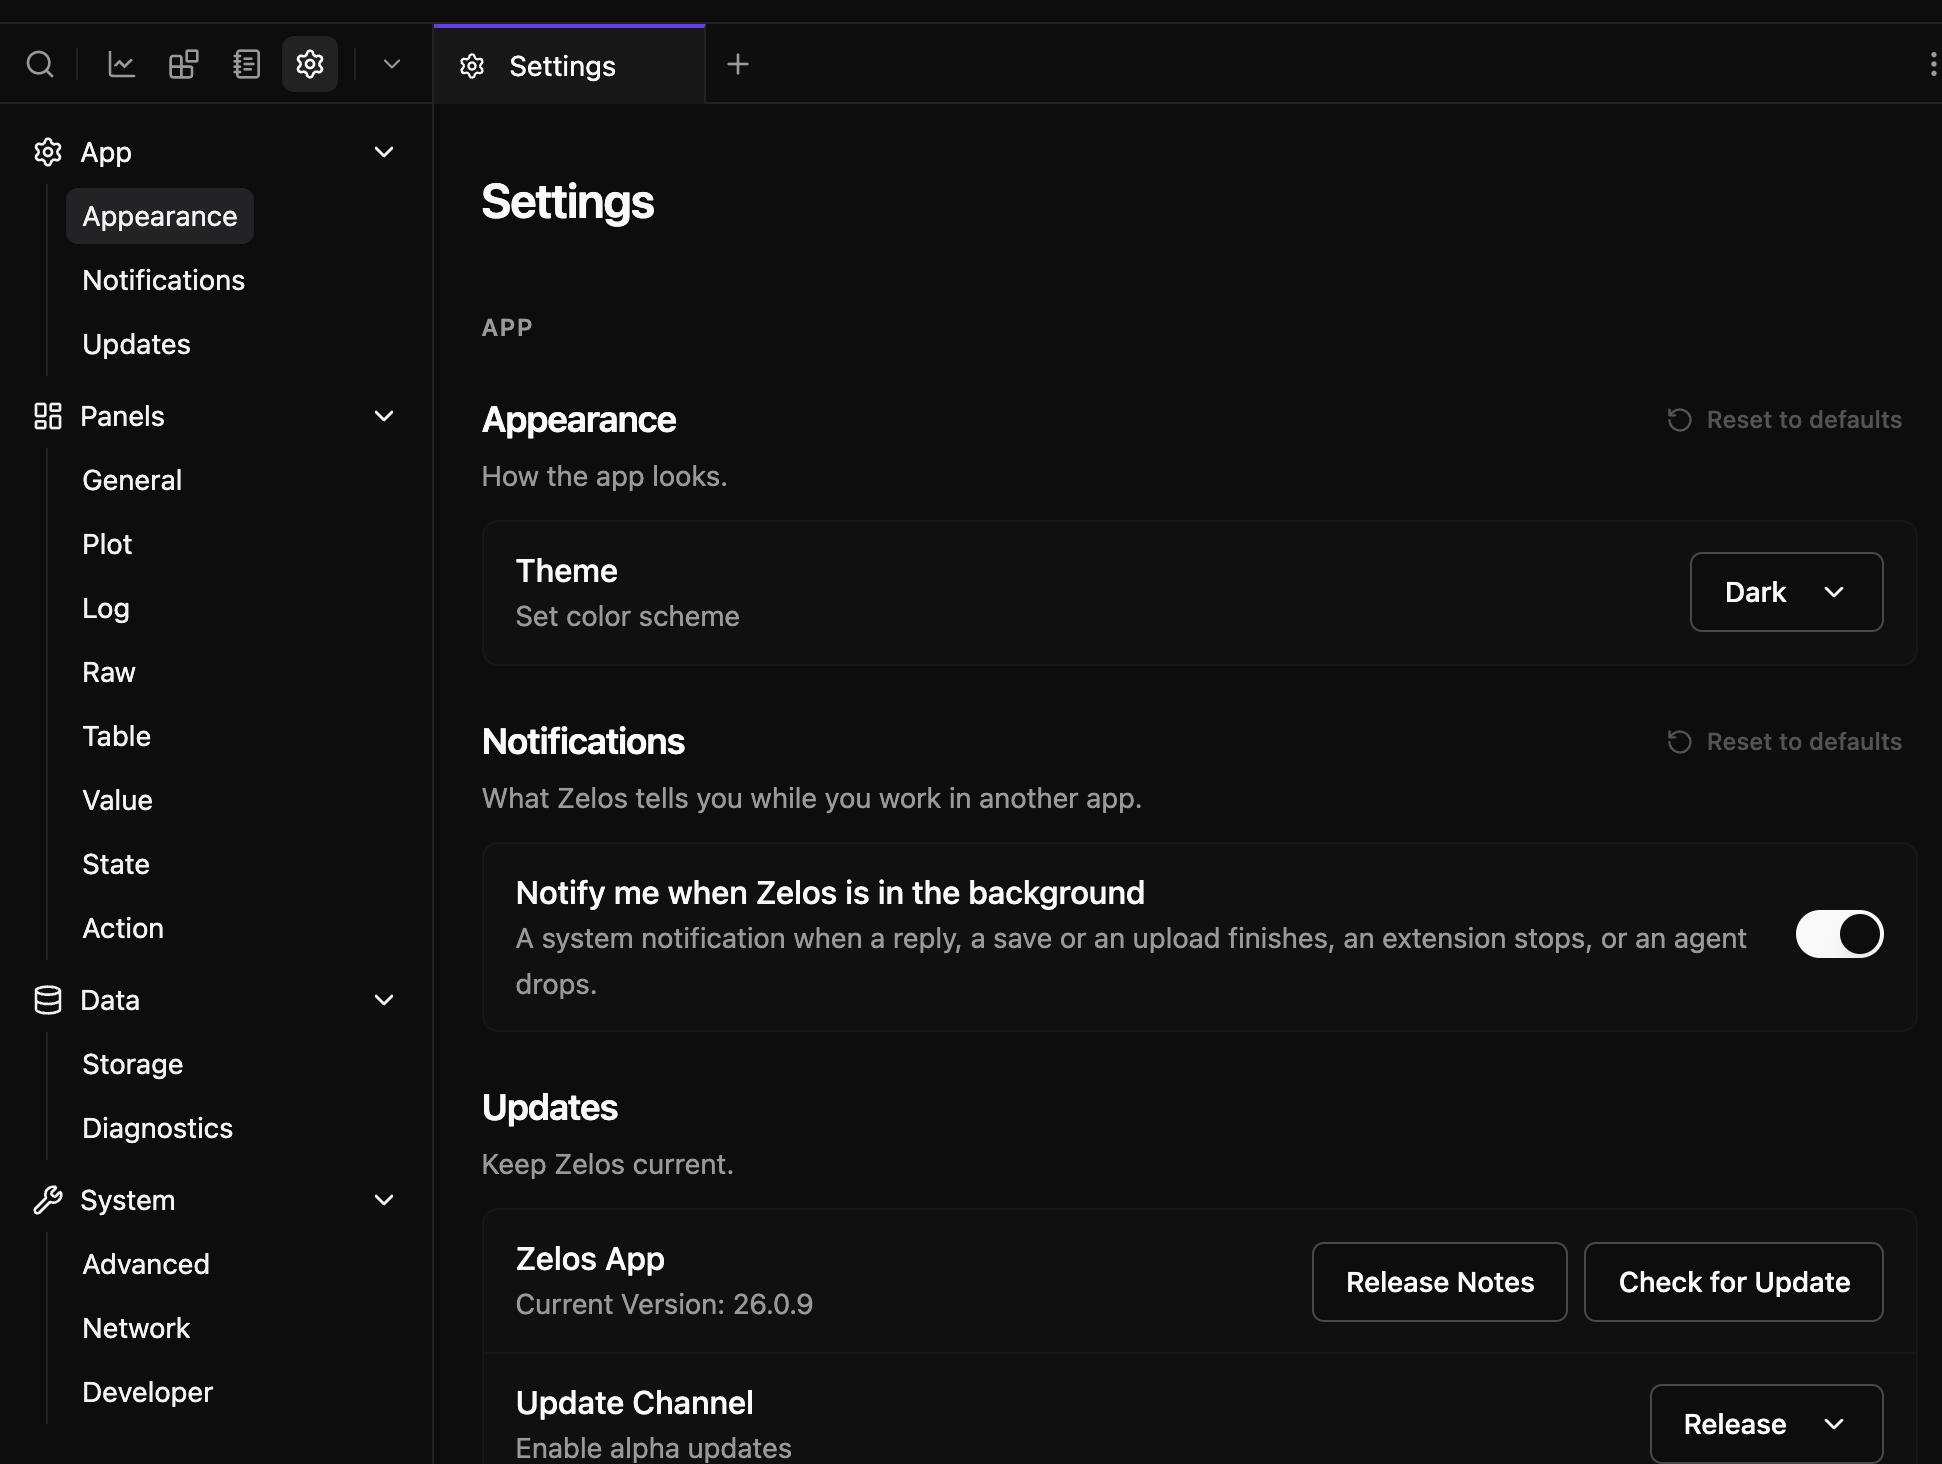
Settings Tab Behavior
Only one Settings tab can be open per workspace. If already open, clicking the Settings button activates the existing tab.
Searching settings
With the Settings view active, use the rail search (Cmd+F / Ctrl+F) to search every setting — names, descriptions, and synonyms all match ("fps" finds Framerate, "telemetry" finds usage analytics). Picking a result scrolls to the exact control and highlights it briefly.
Sections with adjustable defaults show a Reset to defaults next to their title when something in them has been changed.
Team and account
Your organization sits at the top of the settings sidebar, showing its name and your role. Click it to open the team menu. It lists every organization you belong to, so you can switch between them. It also offers Add organization, to accept an invitation, join another organization, or create one, and Manage team, which opens the organization in Zelos Cloud.
If you sign in without an organization, Zelos asks you to create or join one before you go on. While it cannot reach Zelos Cloud to check, the row reads No organization yet · Set up your organization, and clicking it opens the same prompt.
Your account lives at the bottom of the same sidebar. Click Sign in when you're signed out. Once signed in, the row shows your name and email, and its menu offers Billing (opens Zelos Cloud) and Log out. Signing out never deletes local workspaces. Your work stays on your computer.
App
Appearance
Theme — control the app's appearance:
- System - Follow your OS light/dark setting
- Light - Always use the light theme
- Dark - Always use the dark theme (default)
Changes apply immediately.
Use the system title bar (Linux only) - Let your desktop draw the window frame and its buttons. It applies after a restart. Until then, the setting reads Restart Zelos to apply. with a Restart button.
Notifications
Notify me when Zelos is in the background - On by default. While Zelos is not the focused window, it shows a system notification when:
- Zelos AI finishes a reply
- Zelos AI is waiting for your approval
- A trace finishes saving, or fails to save
- A trace upload finishes or fails
- An extension stops unexpectedly
- A connected agent drops
Each kind of notification shows once until you bring Zelos forward again, so an agent that keeps dropping raises one notification, not many. Click a notification to bring Zelos forward. For an AI reply or approval, it also opens the AI chat. macOS may ask for permission the first time.
Updates
On macOS and Windows, Zelos checks for a new version 30 seconds after it starts, then every hour. It downloads the new version in the background. When the download is ready, a Restart to update button appears in the title bar. Click it to restart into the new version. If you don't, the update installs the next time Zelos starts. If the background download fails, the button reads Update, and clicking it retries the download.

On Linux, when you installed the .deb through apt, an Update button appears in the title bar when a newer version exists. It installs the update through the system updater and restarts Zelos.
While you stream live data, the update button's tooltip warns that live data stops while Zelos restarts.
If a trace is still saving or uploading when you click the button, it reads Restarting…, and Zelos restarts once the save or upload finishes. If an update attempt fails, Zelos says why, and the button stays hidden for an hour. Update and Restart App in Settings still works in the meantime.
- Zelos App - Shows the installed version. Check for Update checks right away. When an update is available, Update and Restart App installs it. Release Notes shows what changed, with a NEW badge when an update is available.
- Update Channel - Release (default) for stable releases, or Alpha for pre-release versions.
Updates on Ubuntu
Zelos updates through Ubuntu's system updater, and the Update Channel switches the Zelos apt source. Neither asks for a password when your account is an administrator. Otherwise Ubuntu asks an administrator to approve the update.
If Zelos shows No newer version yet, the Zelos apt repository has not published that version yet. Try again in a few minutes.
Panels
Default options applied to newly created panels, in one section per panel type. These preferences are stored locally in the app (per installation) and are not synced to the agent or other devices. Changing a default never affects existing panels. Each panel keeps the options it was created with, and any option can still be overridden from an individual panel's settings.
- General - Cross-panel signal defaults: Show empty signals (keep signals visible when they have no data in the current view; on by default) and Show full name (show each signal's full path instead of just its name; off by default).
- Plot - Legend visibility and placement, live values, Interpolation (Linear default, Stepped, or Spline), Sample markers and marker size, Line width and pattern, Area fill, axis layout, stacked-plot alignment, hiding the X/Y axes, and the Y axis number format.
- Log - Which columns are shown (timestamps, levels, producers, sources, file, line), message wrapping, font size, auto-scroll, and buffer size.
- Raw - Font size, auto-scroll, and buffer size.
- Table - Font size.
- Value - Column count and font size.
- State - Legend visibility and placement, live values, label font size, stacked-axis alignment, and the time axis.
- Action - Parameter column count, parameter persistence, and how actions execute (Enter to execute, inline button).
Data
Storage
Data Retention
How long to keep live data before it is pruned:
Options: 1, 2, 4, 8 (default), 12, or 24 hours.
Longer retention uses more resources, but allows viewing older live data without reconnecting. In memory mode this increases RAM usage; in disk mode it can also increase disk usage. This setting applies to both memory and disk stores. Disk mode survives restarts, but data older than the retention window is still pruned.
Store Type
Choose how live data is stored:
- Memory - Fastest option. Live data is kept in memory only and is lost on restart.
- Disk - Stores live data on disk so it survives normal restarts.
- Changing the store type requires restart.
- Disk store is currently in beta.
On a normal shutdown, the disk-backed store flushes remaining buffered data before exit. Force-quitting the app or agent can still lose the newest buffered samples.
Memory Limit
Shown when Store Type is set to Memory
Maximum memory usage before live data pruning begins:
- Set as percentage of system memory or absolute value (MB/GB/TB)
- Default: 25% of system memory
- Minimum: 100 MB
- Unlimited: Disable the memory cap and rely on time-based retention only
Disk Size Limit
Shown when Store Type is set to Disk
Maximum disk space for live trace data:
- Set in MB, GB, or TB
- Unlimited disables size-based pruning
- When the limit is exceeded, the oldest on-disk data is pruned first
Store Folder
Shown when Store Type is set to Disk
Choose where disk-backed live data is stored:
- Leave empty to use the default app data location
- Changing the folder requires restart
Clear Store Data
Remove all live data from the current store:
- Works for both memory and disk modes
- Cannot be undone
Diagnostics
Logs Folder
- Opens the folder containing application log files
- Logs capture errors, warnings, and diagnostic information
Log Retention
How long to keep log files before they are deleted:
- Options: 1, 2, 3, 7, 14, or 30 days
- Default: 14 days
Older logs are removed automatically.
Report a problem
Send a problem report directly from the app:
- Sends your description, optional email, the last 24 hours of logs, and system info to Zelos support
- Log bundles are size-capped and scrubbed of credentials before upload
- The dialog's Export button builds the same zip locally without sending — inspect it first, then share it manually. If the agent is unreachable, Export saves redacted log tails instead
- Also available from the title bar's Help menu, and from the crash screen when something goes wrong
Share usage analytics
- Enabled by default
- Helps improve the app by sending usage data: features used, clicks, and session replays
- Turn it off to stop all usage analytics and session replays from this installation
- Crash reports are separate, and still go to Zelos when it is off
System
Advanced
Framerate
UI update frequency for time axis:
- Options: 1, 5, 10, 15, 20, 25, 30, or 60 fps
- Default: 30 fps
- Lower rates reduce CPU usage
Minimum Fetch Interval
Throttles data refresh rate:
- Options: None, 30 ms, 60 ms, 100 ms, 250 ms, 500 ms, 1000 ms
- Default: 100 ms
- Prevents rapid re-fetching
Plot Optimization
Data query strategy:
- M4 (default) - Intelligent downsampling for better performance
- None - Full resolution (raw data)
Developer Mode
Unlocks the Developer section below.
Network
Agent Bind Address
Which network interface the desktop agent listens on:
- Localhost only (recommended) - Only this machine can reach the agent
- All interfaces - Any device that can reach this machine can reach the agent
- Custom... - Enter one address, such as
192.168.1.10or[::1]
Localhost access always stays available. Changing the bind address requires a restart.
The agent does not authenticate clients
On any setting other than localhost, every device that can reach this machine can query traces and call tools. Use it only on trusted networks.
Developer
Visible while Developer Mode is on.
- Debug Logs - Saves additional logging during trace capture; helpful for troubleshooting
- Performance Overlay - Shows performance metrics; toggle with
Ctrl+D - Restart Agent - Manually restart the background agent process
Next Steps
-
Sign in and authenticate
-
Save and share layouts
-
Master workspace features