Guided tour
The first time you sign in to the desktop app, it welcomes you with the tour, right after you create or join your organization. Where the AI is on, first launch first asks what you are working with, then welcomes you with the tour while Zelos sets it up, or as you look around if you skip the question. Its one button is Start the tour. You can take it again at any time from the title bar's Help menu (Take the tour) or the command palette (Start the guided tour).
It is eight steps. A simulated battery site comes online and misses a dispatch target. You work out why, then ask Zelos AI, and it reaches the same answer and writes it up as a notebook, where the tour ends. Everything you do is the real app. The Marketplace, the panels, the timeline and the AI Chat view are all real.
What is behind them is not. The tour plays in a view of its own over the window, a copy of the app that talks to a simulated site instead of to your agent and your account: the bus, the extension and the assistant's reply are all made up on this machine. Nothing is written to disk, nothing reaches your agent, and nothing leaves for the cloud. The window under it stays as you left it, with any setup still running in its chat. Exit tour on any card leaves it, and leaving closes the view and everything in it. So does quitting mid-tour. If the AI is off for your organization, the welcome comes back on the next launch, because the tour never ended. If the tour cannot start or runs into a problem, it ends, says so, and leaves the window as it was; you can start it again from Help.
The story
A grid-connected battery site is asked for a fast ramp to 248 kW and delivers 206. Its battery management system (BMS) reports a comms fault and cuts the pack's power limit.
The pack is fine. What actually happened is that the DC bus sagged under the ramp. The heartbeat between the power conversion system and the BMS missed three frames 300 ms later. The BMS read that silence as a pack fault. The evidence that clears the battery is on a different bus from the component that got blamed. Finding it means having every source on one timeline.
The eight steps
The Data view, Explorer, the extension's page, the sidebar search, the AI Chat view and the write-up are opened for you. The tour asks you for the actions worth learning, and for one click on the rail, so you have opened a view yourself. The steps come in three chapters: connect, investigate, answer.
| Step | What you do | What it shows you |
|---|---|---|
| 1 | Connect the localhost agent |
The Data view lists agents, which read your hardware, and recorded traces, which open here too. The app runs its own agent; remote agents connect the same way |
| 2 | Open the Extensions view from the rail | Explorer opens as this step begins, and is empty: it lists what an agent has. Extensions give an agent its signals and actions, for an interface such as CAN, Modbus, OPC UA or serial |
| 3 | Install CAN Bench from its page | A grid battery site simulated on a CAN bus, with no hardware: a pack and its BMS, a DC/DC converter, an inverter, and a site controller |
| 4 | Open its configuration in Explorer, then Save & Start | Installed extensions run from Explorer. The channel and bitrate come filled in, so you can start without changing them |
| 5 | Press Execute on the dispatch action | Actions send commands to your hardware and come back with a result. Here that is a time range, and the timeline pauses on it. The site delivers less than you asked for |
| 6 | Drag input_voltage onto the Power plot, or double-click it |
Explorer lists every signal the agent decodes. The tour opens the sidebar search on that signal, and the Power plot is already there. You add the signal to it |
| 7 | Turn on the Measurement tool | Two cursors on the sag, and each legend chip shows how much its signal changed between them: the DC bus fell before the BMS cut the limit |
| 8 | Send the prefilled question | Zelos AI answers in the AI Chat view. It reads the same data you did, checks the pack, builds a layout of the fault, and writes the finding into a notebook. It reaches the same answer you did |
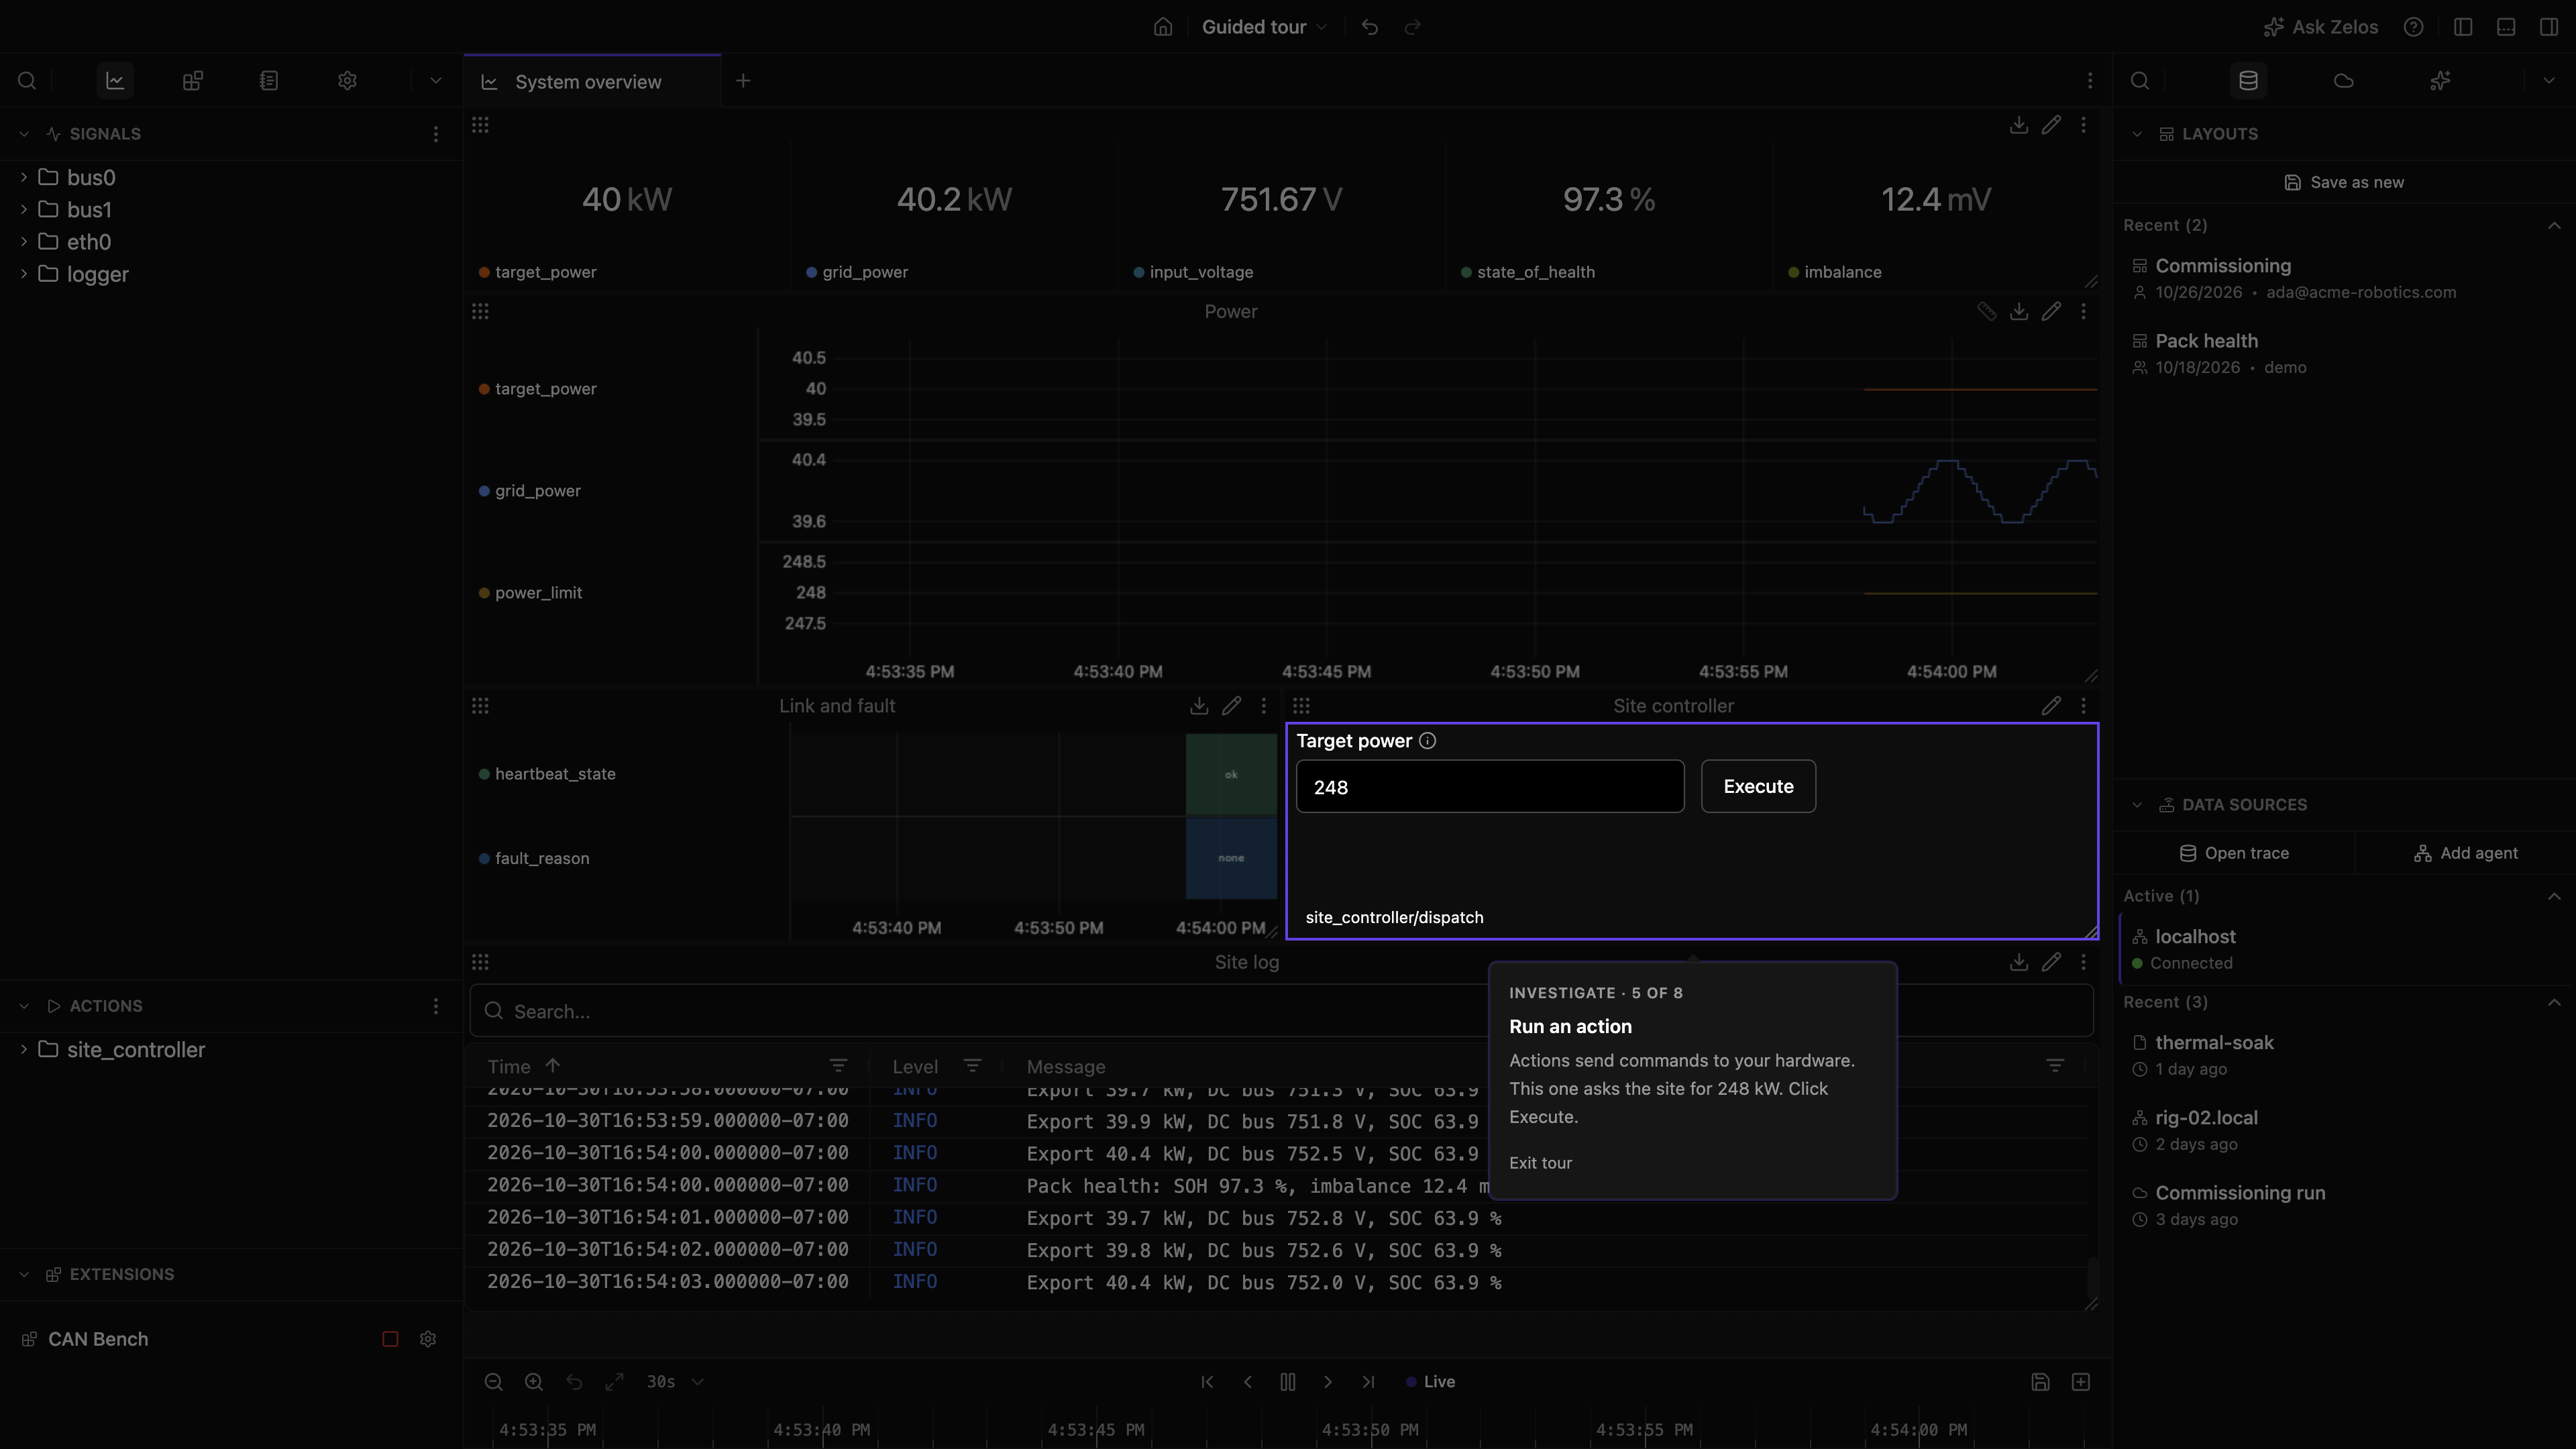
A step moves on when the thing it asked for actually happened, not when something was clicked. The dispatch counts when the site returns a window that holds the failure. The measurement counts when its cursors span the drop. An instruction card has no way to skip past it. The cards that report what just happened carry Continue, which is you saying you have read them.
While it runs
Only the control the current step asks for responds. Everything else is dimmed and inert. A click there does nothing, on purpose. ++escape++ asks whether you want to leave rather than dropping you out.
Keyboard shortcuts are held back for the same reason, with one exception: quitting the app always works. The close-window shortcut does not, because a window closing under a running tour leaves it pointing at furniture that is gone. The window's own close button is not a shortcut and still closes the window, and the tour with it.
The answer's card sits over the write-up it produced. Continue there opens one last screen, the way the tour began. If the tour played over a first-launch setup, it says where that setup stands: finished, waiting on you in the chat, or still working. Otherwise it points you at your own hardware. Done ends the tour.
While it runs, the Data view, the Layouts section and the Cloud view show the tour's own agents, traces and layouts in place of yours, so nothing of yours is on screen or at risk. Leaving removes the site, its workspace and the assistant's write-up. CAN Bench goes with them. It is a prop the tour builds its story out of, not an extension you keep, and it appears in the Marketplace only while a tour is running. Start the tour again from Help.
What the settings do
The configuration dialog has two, and both reach the data.
- Channel is the interface the bus publishes on. It names the source in the site's log and in the assistant's write-up.
- Bitrate is how fast the bus runs, and so how many frames a second arrive. The faster one makes every trace denser. Save & Start applies both. They come filled in, so you can start without changing either.
The write-up
The assistant writes one as part of answering, and the tour opens it with the answer. It is a read-only notebook holding the run. It lists what moved and in what order, the pack checks (three of which pass), the cause, and the queries behind all of it. It lives in the tour's own notebook library for as long as the tour does, and there is no file on disk.
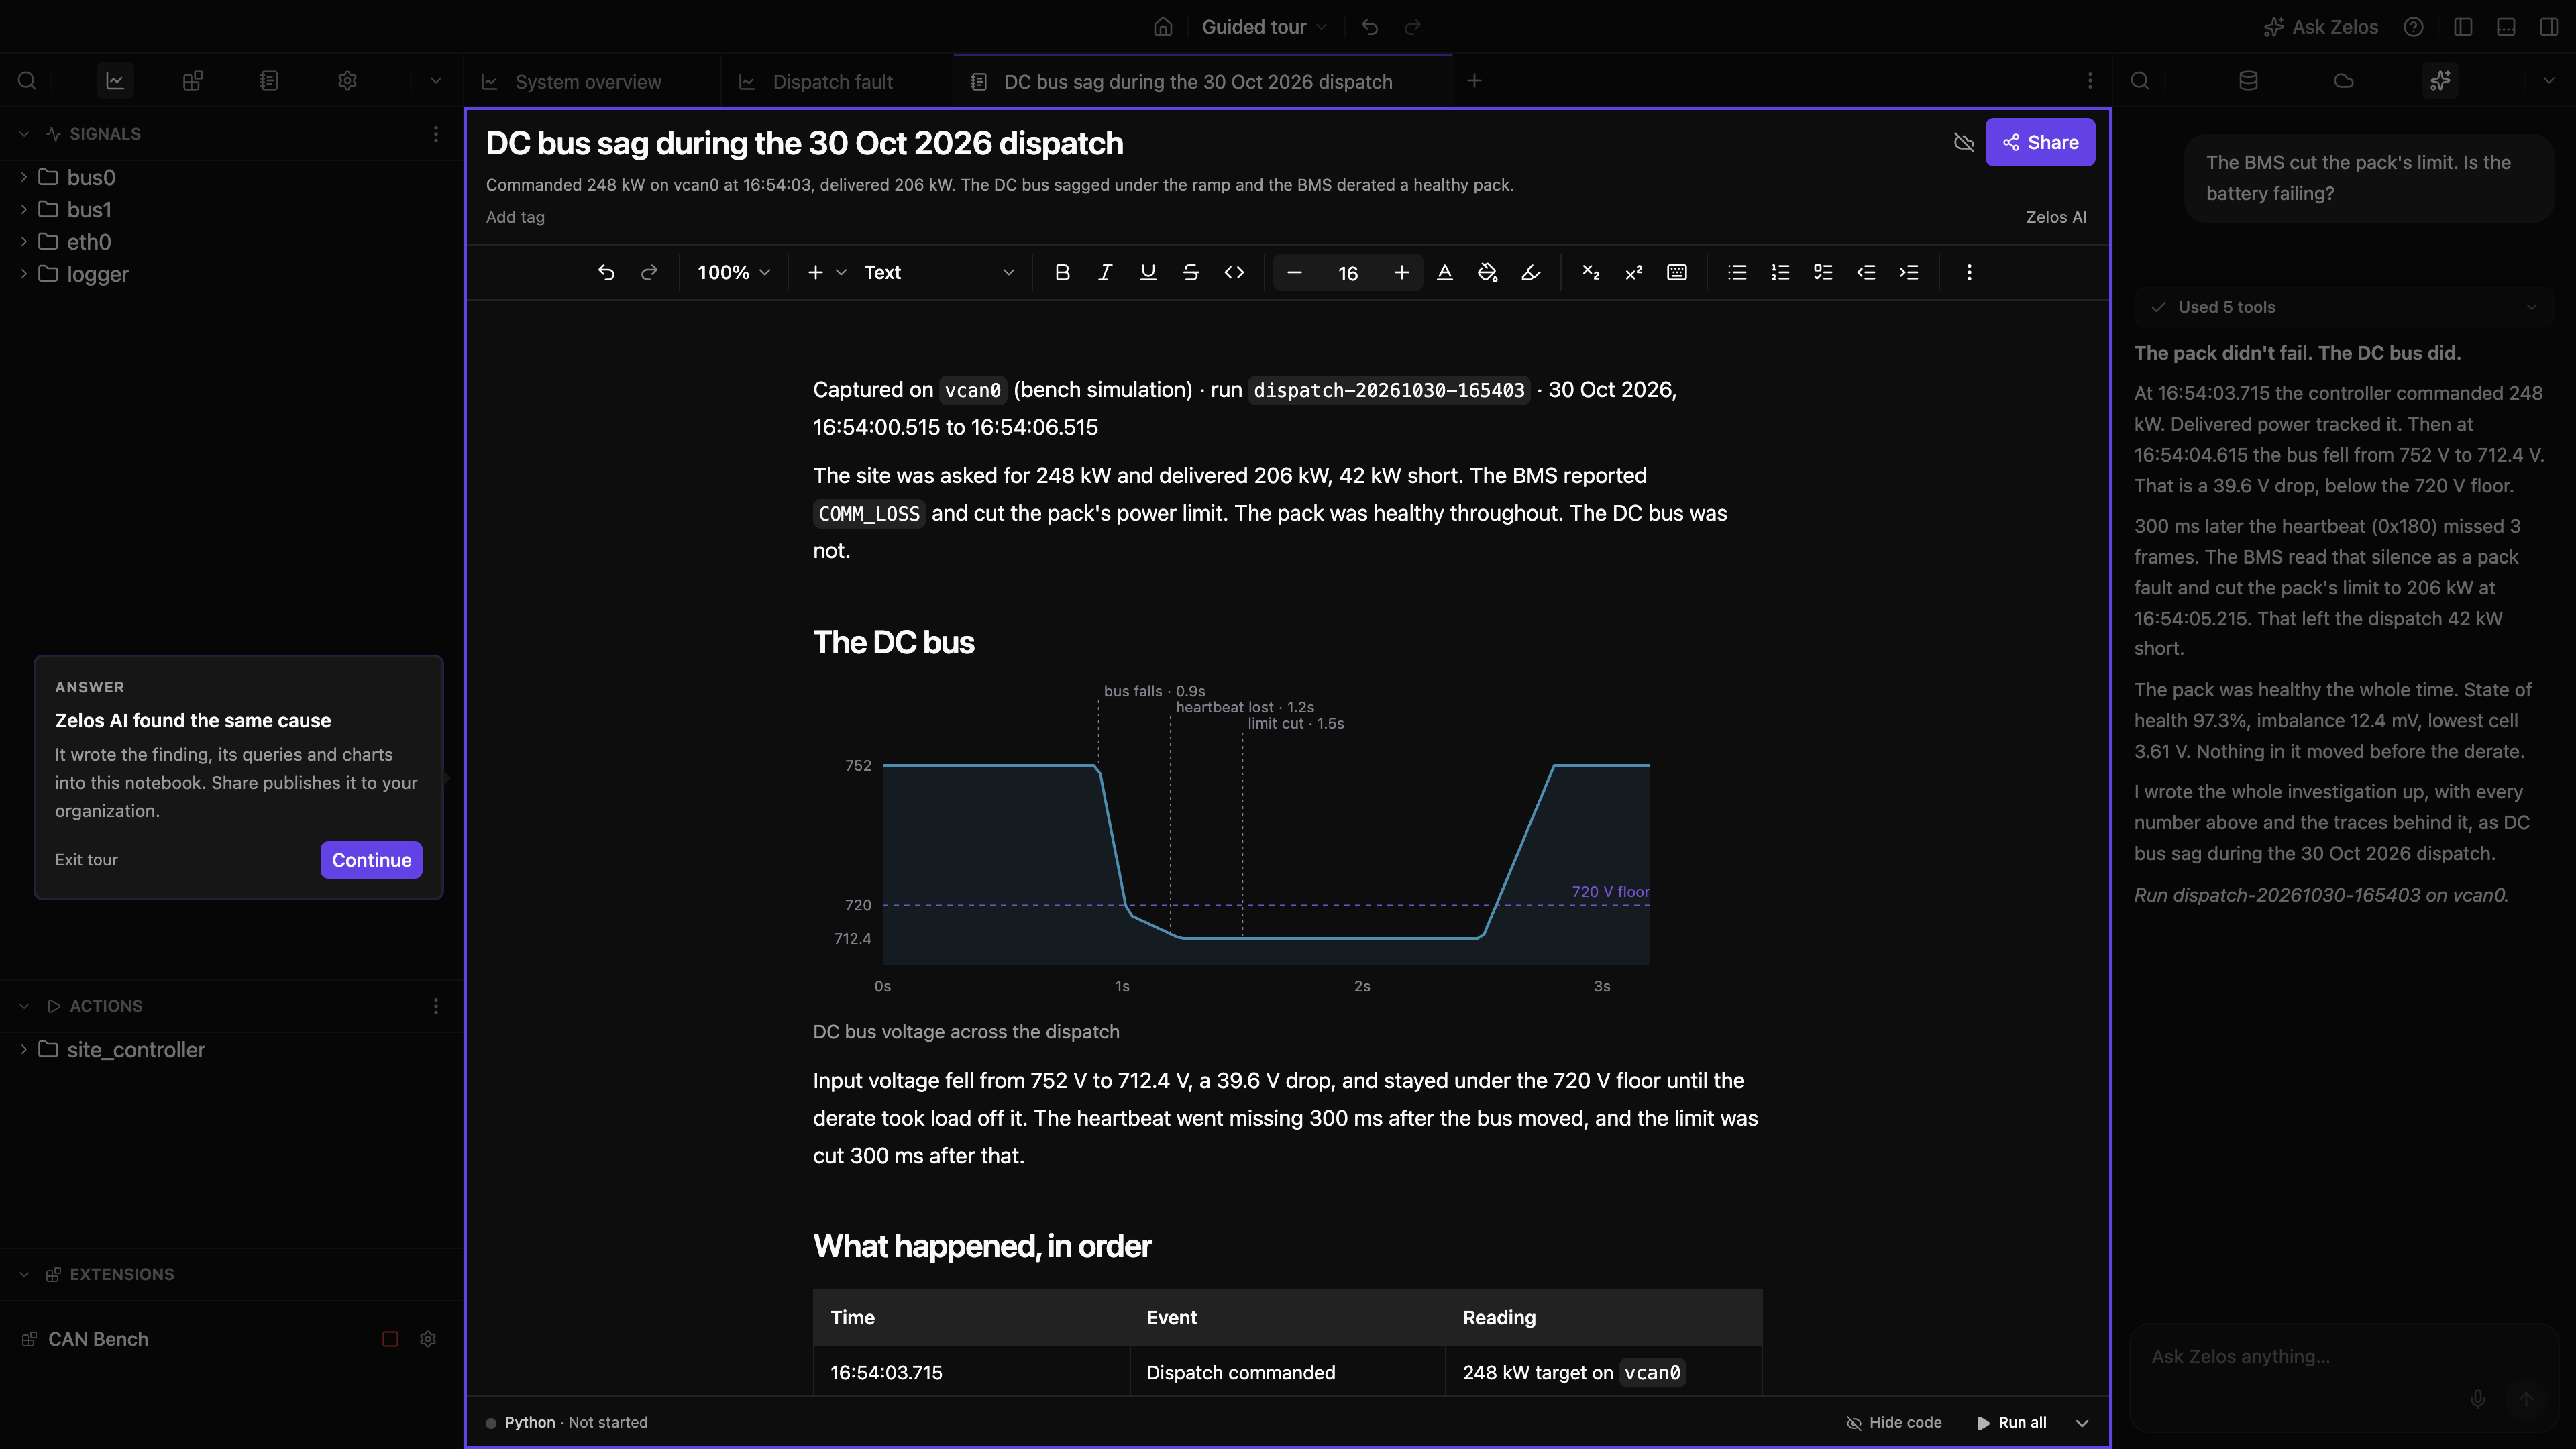
The queries it lists are the part worth keeping. Point the same four at your own capture and they answer the same question about it.
Then your own hardware
Real hardware works the same way you just watched, and by the same steps: connect an agent, install its extension, configure it, start it. CAN Bench simulates a site rather than reading one, but it is installed and run exactly like an extension that does.
The agent is the process that owns the connection, collects the data and answers
queries. The tour used the one this app bundles, called localhost, which is why step 1
connects to it. An agent can also run on a bench machine, or on the vehicle itself:
connect that one from the Data view, and install the extension onto it instead. The
rest is what you have already done.
See Installing the agent for getting one running, and Extensions for what is there to install.