Getting Started
Connect a data source and plot your first signal.
First launch
The first launch takes you from sign-in to your own signals.
- Sign in. Choose a provider or log in with a code, as described in Initial Setup. The app comes to the front when sign-in completes.
- Name your organization. One field, already filled in. See Name your organization.
- Pick what you're working with. See Pick what you're working with.
- Take the tour while Zelos sets it up. The app opens with the setup running in the AI chat. See While Zelos sets up.
- Use the app. Your dashboard is there once Zelos builds it.
The first three steps fill the window. Where the AI is off for your organization, the app skips the question and welcomes you with the guided tour instead.
Name your organization
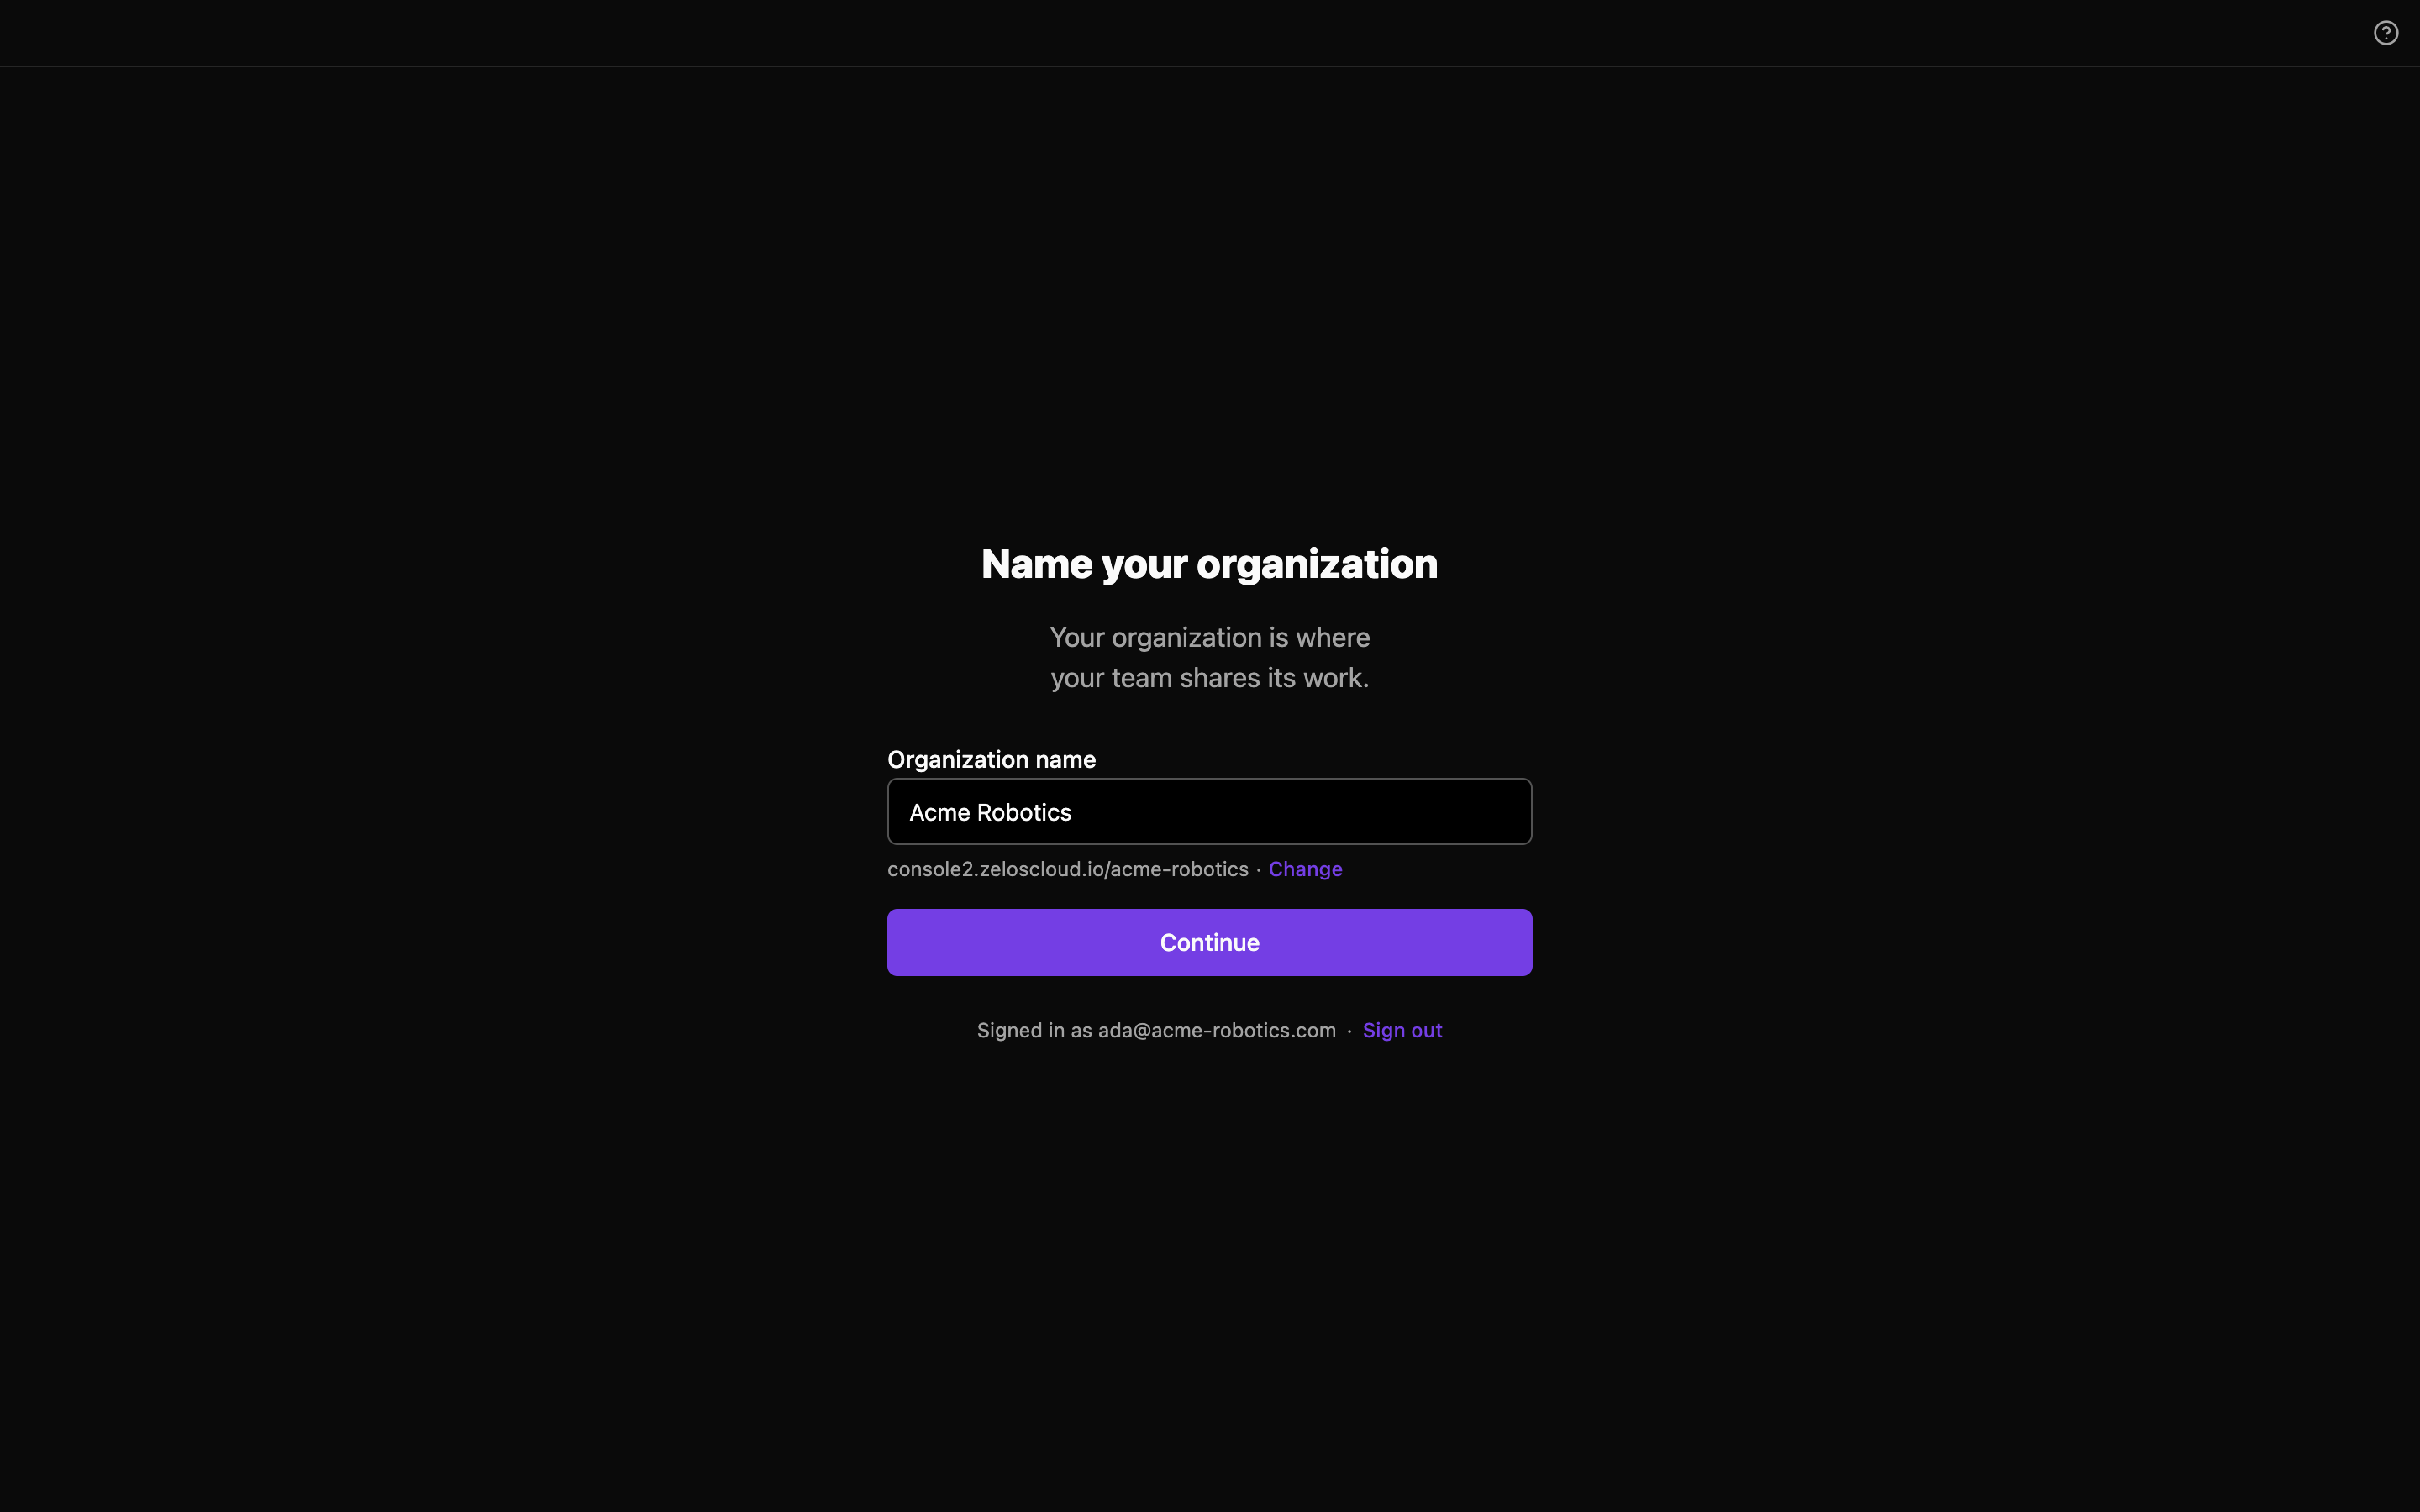
After you sign in, the app asks for one field: Organization name. Your organization is where your team shares its work.
The app fills in the field for you: your company name from a work email, or your first name and "team" from a personal email, such as "Priya's team". Edit it if it is wrong, then press Enter or select Continue.
A line under the field shows the URL of your organization. Select Change to edit it. If the URL is taken and you did not choose it yourself, Zelos adds a suffix to it automatically.
If your team is already on Zelos, the app lists it with a Join button instead. See Organizations.
Pick what you're working with
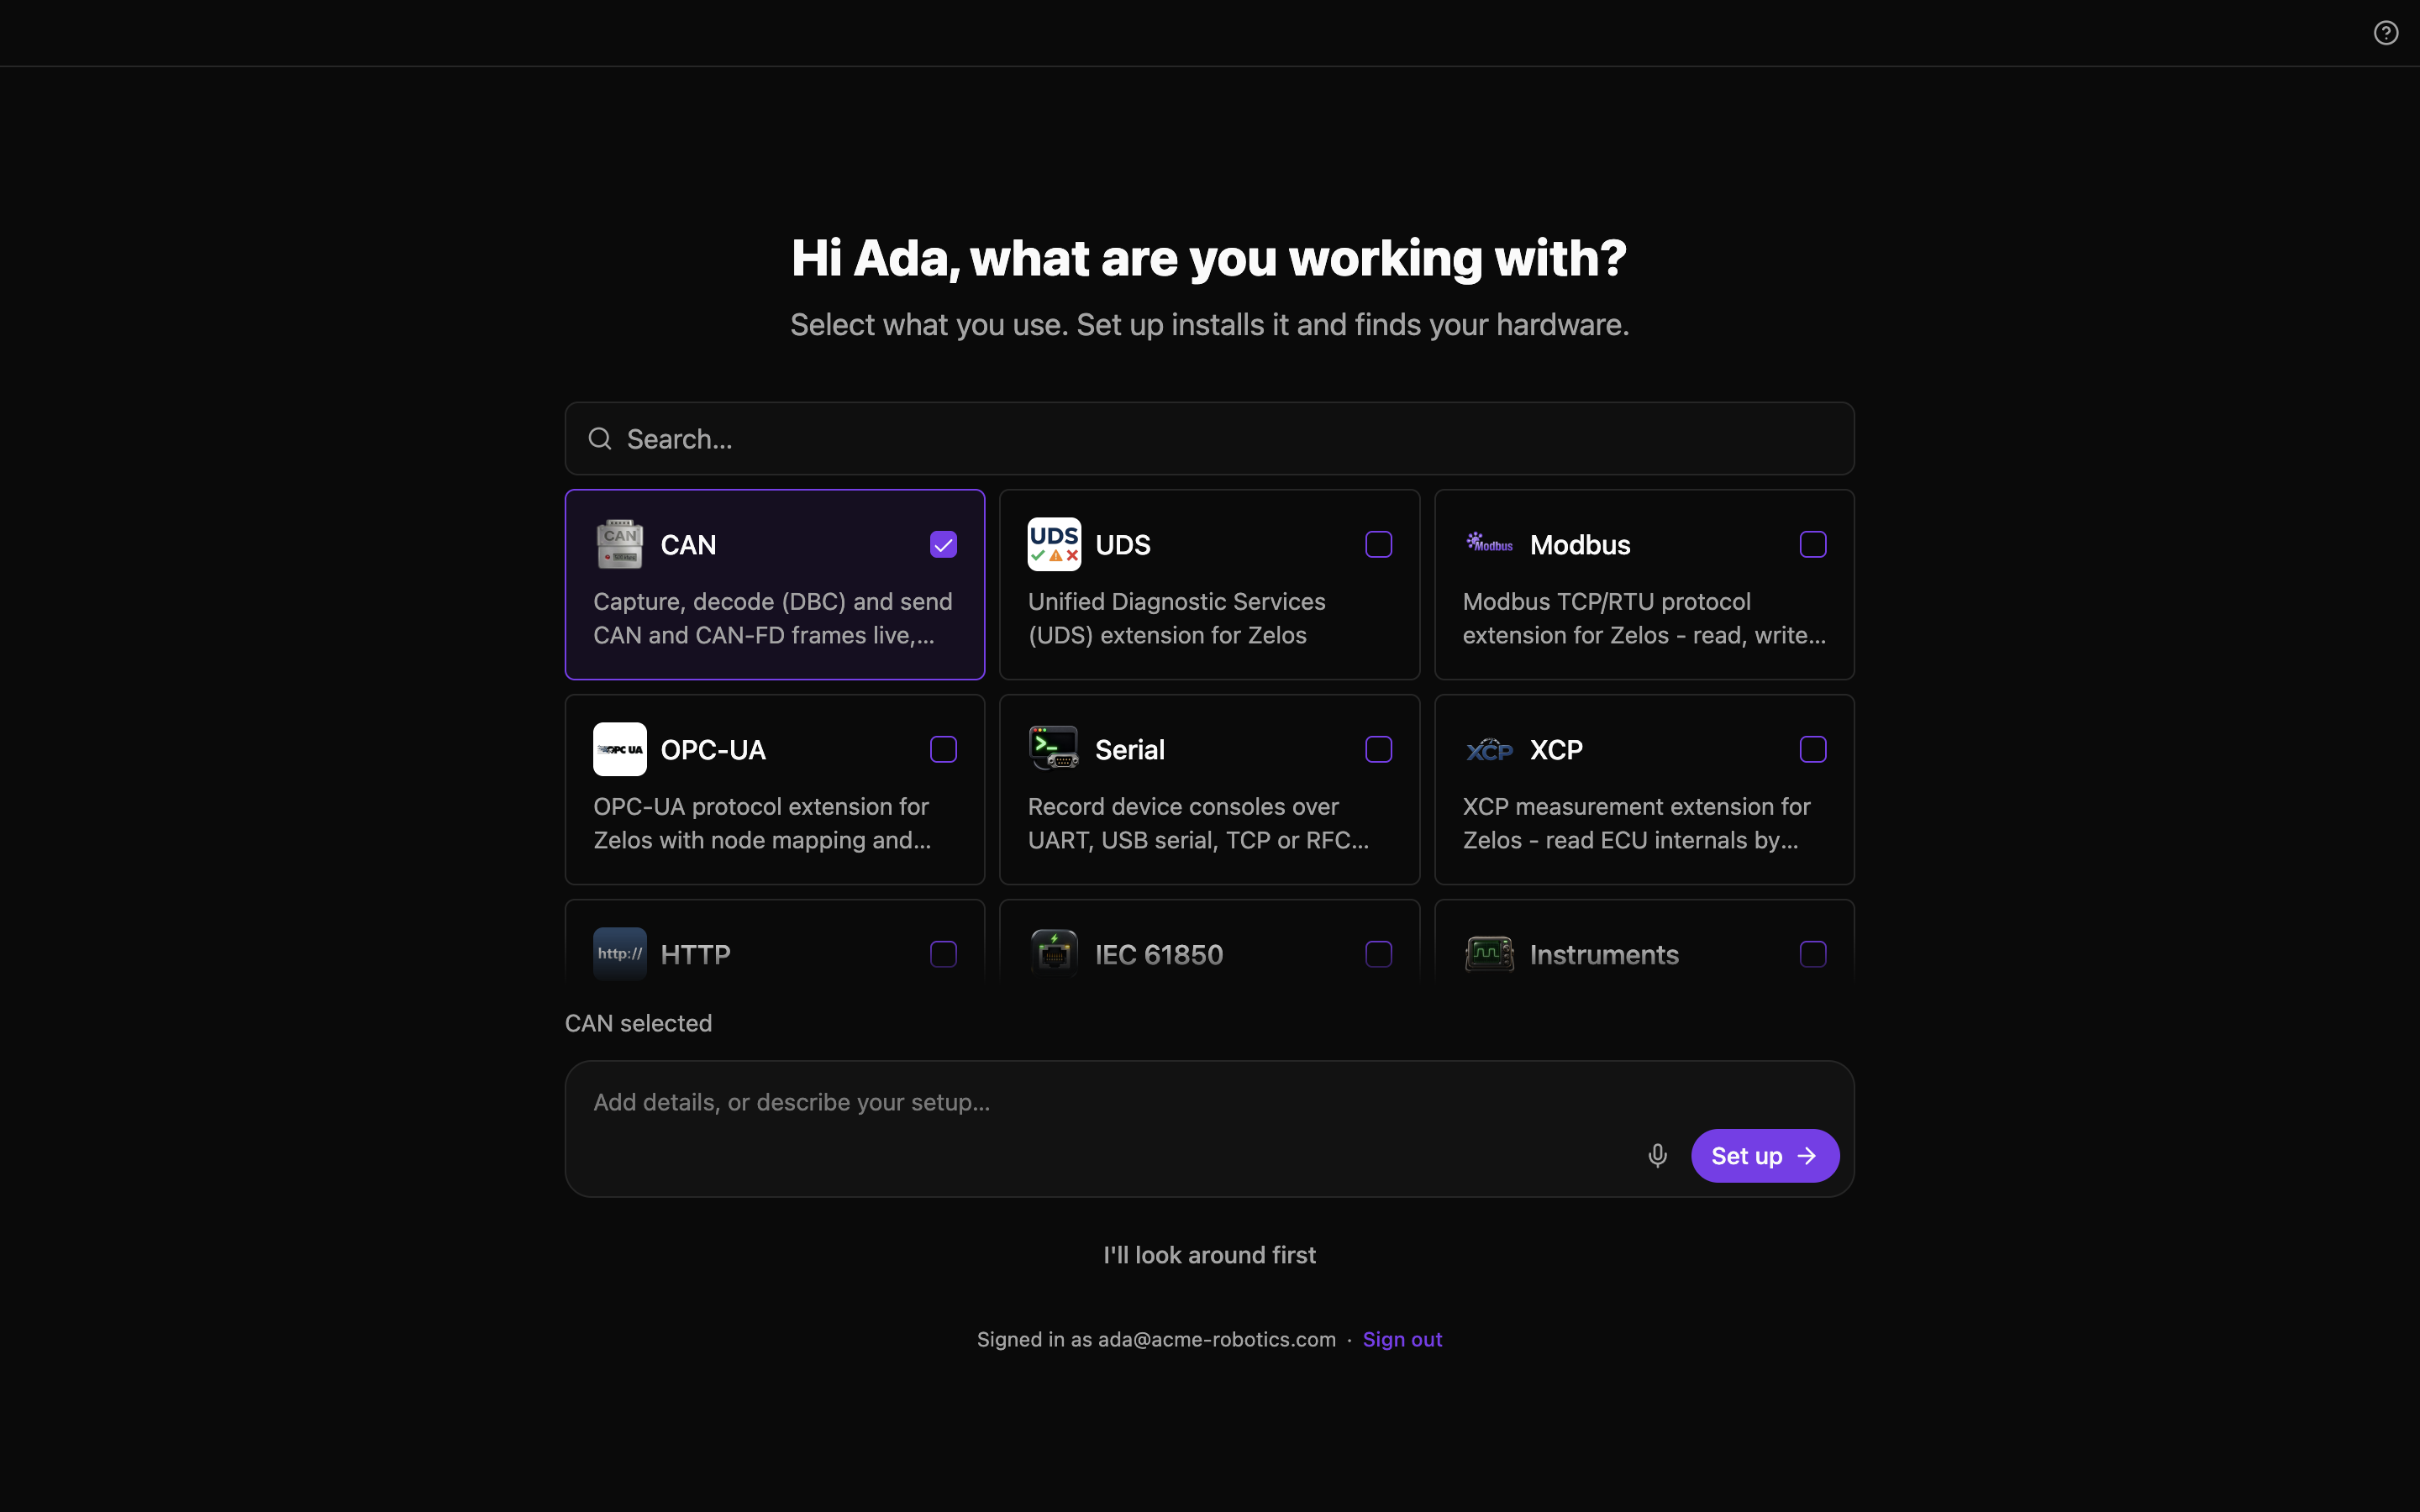
The app asks What are you working with? and shows a tile for every data source in the extension marketplace, each with its logo, name and description. A new extension appears as soon as it is published. Type in Search to find one by name, description or keyword.
Check everything you have. Below the tiles is the same box you ask Zelos in on Home. Add details there, such as an address or a port, or describe your setup in your own words without picking a tile: type, or dictate with the microphone. Where your organization allows attachments, you can also attach files, such as a photo of your bench or a datasheet. Select Set up, or press Enter.
Set up is your OK for the setup's first run: Zelos installs, configures and starts what you picked without asking. It asks in the chat before anything else, such as installing an extension you did not pick or sending a command to a device. Once Zelos finishes its first reply, it asks again before each of these steps.
If the marketplace cannot be reached, the app says Couldn't load extensions. Select Try again, or describe your setup in the box.
If your email needs verifying first, the app shows Verify your email to set things up in place of the tiles and the box. Open the link in the email Zelos sent you, then select I verified it.
Select I'll look around first to go to Home, where the app welcomes you with the guided tour. If the app shows the wrong account, select Sign out at the bottom.
While Zelos sets up
Zelos does the setup in the AI chat on the right: it installs what you picked, finds your device, connects to it, checks that the data reads right, and builds your dashboard. The chat shows your request and each step as it happens. It is the same chat you use in the app afterward.
If Zelos finds no device, it starts the extension's demo or simulated mode when the extension has one, and builds your dashboard from it. The chat says first that the data is simulated, then what was missing, such as a driver or a cable. When the extension has no demo, Zelos builds nothing and says in the chat what it needs.
Once you select Set up, the app opens with the chat on the right and welcomes you with the guided tour while you wait. Select Start the tour to play it over the window. The setup carries on underneath. When you leave or finish the tour, you are back in the app, on your dashboard if Zelos has built it.
If Zelos needs something from you, such as a setting only you know or your OK for a step, it asks in the chat. Answer there and it carries on. If you quit the app during the setup, it opens as usual next time, with the setup's chat in your chat history.
Take the guided tour again any time from the title bar's Help menu or the command palette. It walks one real investigation end to end against a simulated site. Nothing it shows you is written to disk or sent anywhere, and it removes everything it made when it ends.
Initial Setup
Authentication
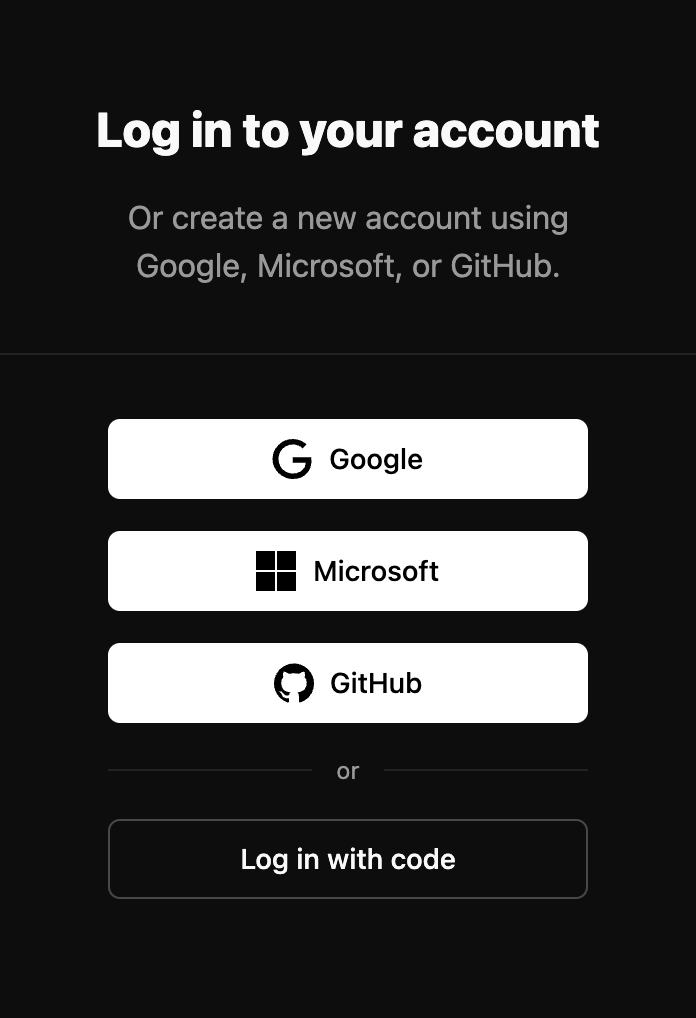
On first launch, Zelos shows Log in to your account. Choose a provider or log in with a code:
OAuth Providers
- Click your provider - Google, Microsoft, or GitHub
- Authorize in browser - Review permissions and approve
- Return to app - Authentication completes automatically
The browser shows Login Successful when the app has your session. Close the window and return to Zelos.
Device Code
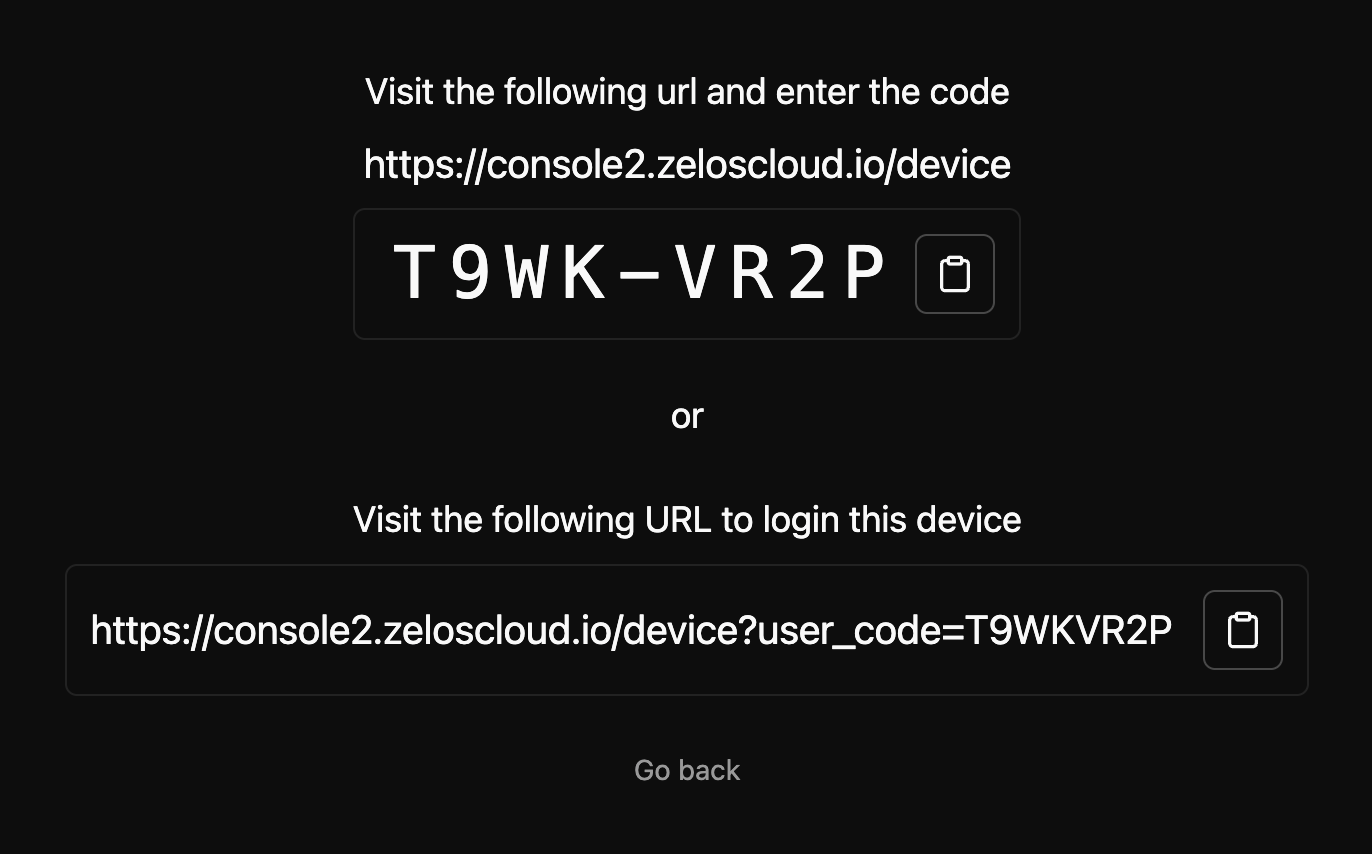
- Click Log in with code, the outline button below the providers
- Copy the 8-character code (shown as
T9WK-VR2P), or use its copy button - On any device, open the URL the app shows —
https://console2.zeloscloud.io/device - Enter the code and click Continue. Case and the dash don't matter.
- When the page asks Authorize this device?, click Approve
Organization access
Every account belongs to an organization. If you sign in without one, Zelos asks you to name one, or join your team's, before you go on. See Organizations.
When the app opens, before you sign in, it:
- Starts the local agent - Enables data reception on port 2300
- Starts the updater - Checks for new versions of the app
Signing in adds your team's layouts, the cloud library, and Zelos AI.
Interface Overview
The app interface consists of:
- Command Palette (
Cmd+K/Ctrl+K) - Run commands from anywhere in the app - Left Sidebar (
Cmd+\/Ctrl+\) - The Explorer (signals, actions, extensions), Extensions, Notebooks, and Settings views, plus installed app extensions - Main Area - Workspace tabs for panel layouts, notebooks, Settings, and app extensions
- Right Sidebar (
Cmd+J/Ctrl+J) - The Data (layouts and connections), Cloud, and AI Chat views - Timeline (bottom) - Navigate time and control playback
All sidebars are resizable and their states persist across sessions.
Basic Workflow
Step 1: Connect to Data
You have two options for getting data into the app:
Option A: Live Connection
Connect to a running agent streaming real-time data:
- Click Connect localhost on Home
- The app connects to
localhost:2300by default - Your signal tree (left sidebar) populates with available data
Remote Agents:
To connect to a remote agent:
- Open the right sidebar (
Cmd+J/Ctrl+J) and choose the Data view - Click New agent. It reads Add agent while any agent is connected, including the local agent in a live workspace.
- Type the agent's hostname or IP address (e.g.,
192.168.1.100). The field shows the fixedgrpc://prefix and:2300port around it. - Press
Enteror click Connect
Your connection is saved for quick access later.
Option B: Open a Trace File
Load previously recorded data for analysis:
- Click Open trace on Home, the welcome screen Zelos opens to
- Select your
.trzfile - The timeline adjusts to the trace's time range
- Workspace switches to Trace mode
Quick Open
Double-click any .trz file to automatically launch the app and load the trace.
Step 2: Visualize Data
Once connected, add signals from the left sidebar to create visualizations:
Adding Signals
The Explorer view in the left sidebar lists every source, event, and field:
With more than one agent connected, each agent becomes the top level of the tree.
Quick Methods:
Drag & Drop
- Expand sources and events to find your field
- Drag a field to the workspace
- Drop it into an existing panel to add it there, or drop it on empty layout space or a row boundary to create a new panel automatically. Zelos picks the panel from the field's type, such as a Plot for a number
Double-Click
- Double-click any field to create a new panel with that signal, picked from the field's type
Multi-Select
Cmd+Click/Ctrl+Clickto select multiple fields- Drag any selected field to add them all at once
Folder Drag
Drag entire folders to add all signals within. This works at any level (agent, source, or event). A folder drag opens a panel for each kind of data it holds, such as a Log panel for logs and a Plot for numbers. See Add and arrange panels.
Starting with other panel types
To start with a Table or Value panel, click Add panel in the timeline toolbar and drag signals into that panel. You can also right-click signals in the Explorer and choose Open as, or choose Change to in an existing panel's menu.
Your first panel appears with the signal in the view that fits its type, such as plotted over time for a number. If it lands below the visible part of the current layout, Zelos scrolls it into view and briefly outlines it so you can see where it was added. Zelos stores the most portable binding it can for that panel, so the view is easier to reload and reuse later.
Essential Concepts
Workspaces, Tabs, and Panels
- Workspace: Your entire Zelos session, auto-saved continuously
- Tabs: Different views within a workspace (like browser tabs)
- Panels: Individual visualizations within a tab
Workspace
├── Tab 1: "System Overview"
│   ├── Plot Panel: CPU & Memory
│   ├── Table Panel: Current Values
│   └── Log Panel: System Events
└── Tab 2: "Detailed Analysis"
    ├── Plot Panel: All Sensors
    └── Plot Panel: Derived Metrics
Live Mode vs Trace Mode
| Aspect | Live Mode | Trace Mode |
|---|---|---|
| Data Source | Real-time stream | Recorded file |
| Time Range | Moving window | Fixed range |
| Playback | Play/pause current data | Navigate entire recording |
| Use Case | Active debugging | Post-mortem analysis |
Signal Organization
Signals follow a hierarchical structure with support for nested events:
Source (Device/Application)
└── Event (Logical Group, supports nesting)
    └── Field (Individual Value)
Example: robot/motors/left.rpm
- Source:
robot - Event:
motors/left(nested events) - Field:
rpm
Events can be nested to organize related data logically.
Account Management
Check Your Status
Open Settings (gear icon in the sidebar rail). Your team sits at the top of the settings sidebar and your account at the bottom. See Team and account.
Once signed in, you can:
- Save and share layouts - Layouts sync to Zelos Cloud so your team can use them
- Access team layouts - Use layouts created by your team
- Upload traces and publish notebooks - Keep them in your organization's cloud storage and share them by link
- Carry your identity - Your account and team membership follow you to any machine you sign in on; local preferences (theme, panel defaults) stay with each installation
Sign Out
- Click Settings in the sidebar rail
- Click your account row at the bottom of the settings sidebar
- Pick Log out — it takes effect immediately
Local Work Preserved
Signing out doesn't delete local workspaces. Your work remains on your computer.
What's Next?
Now that you've created your first visualization, explore these key features:
-
Master tabs, modes, and workspace management
-
Discover all sidebar features and shortcuts
-
Explore Plot, Table, Raw, Log, Value, State, and Action panels
-
Open one launcher for tabs, timeline, settings, and more
-
Save and share panel arrangements with your team
-
Navigate time ranges and control playback
-
Use powerful glob patterns to find signals