Sidebars
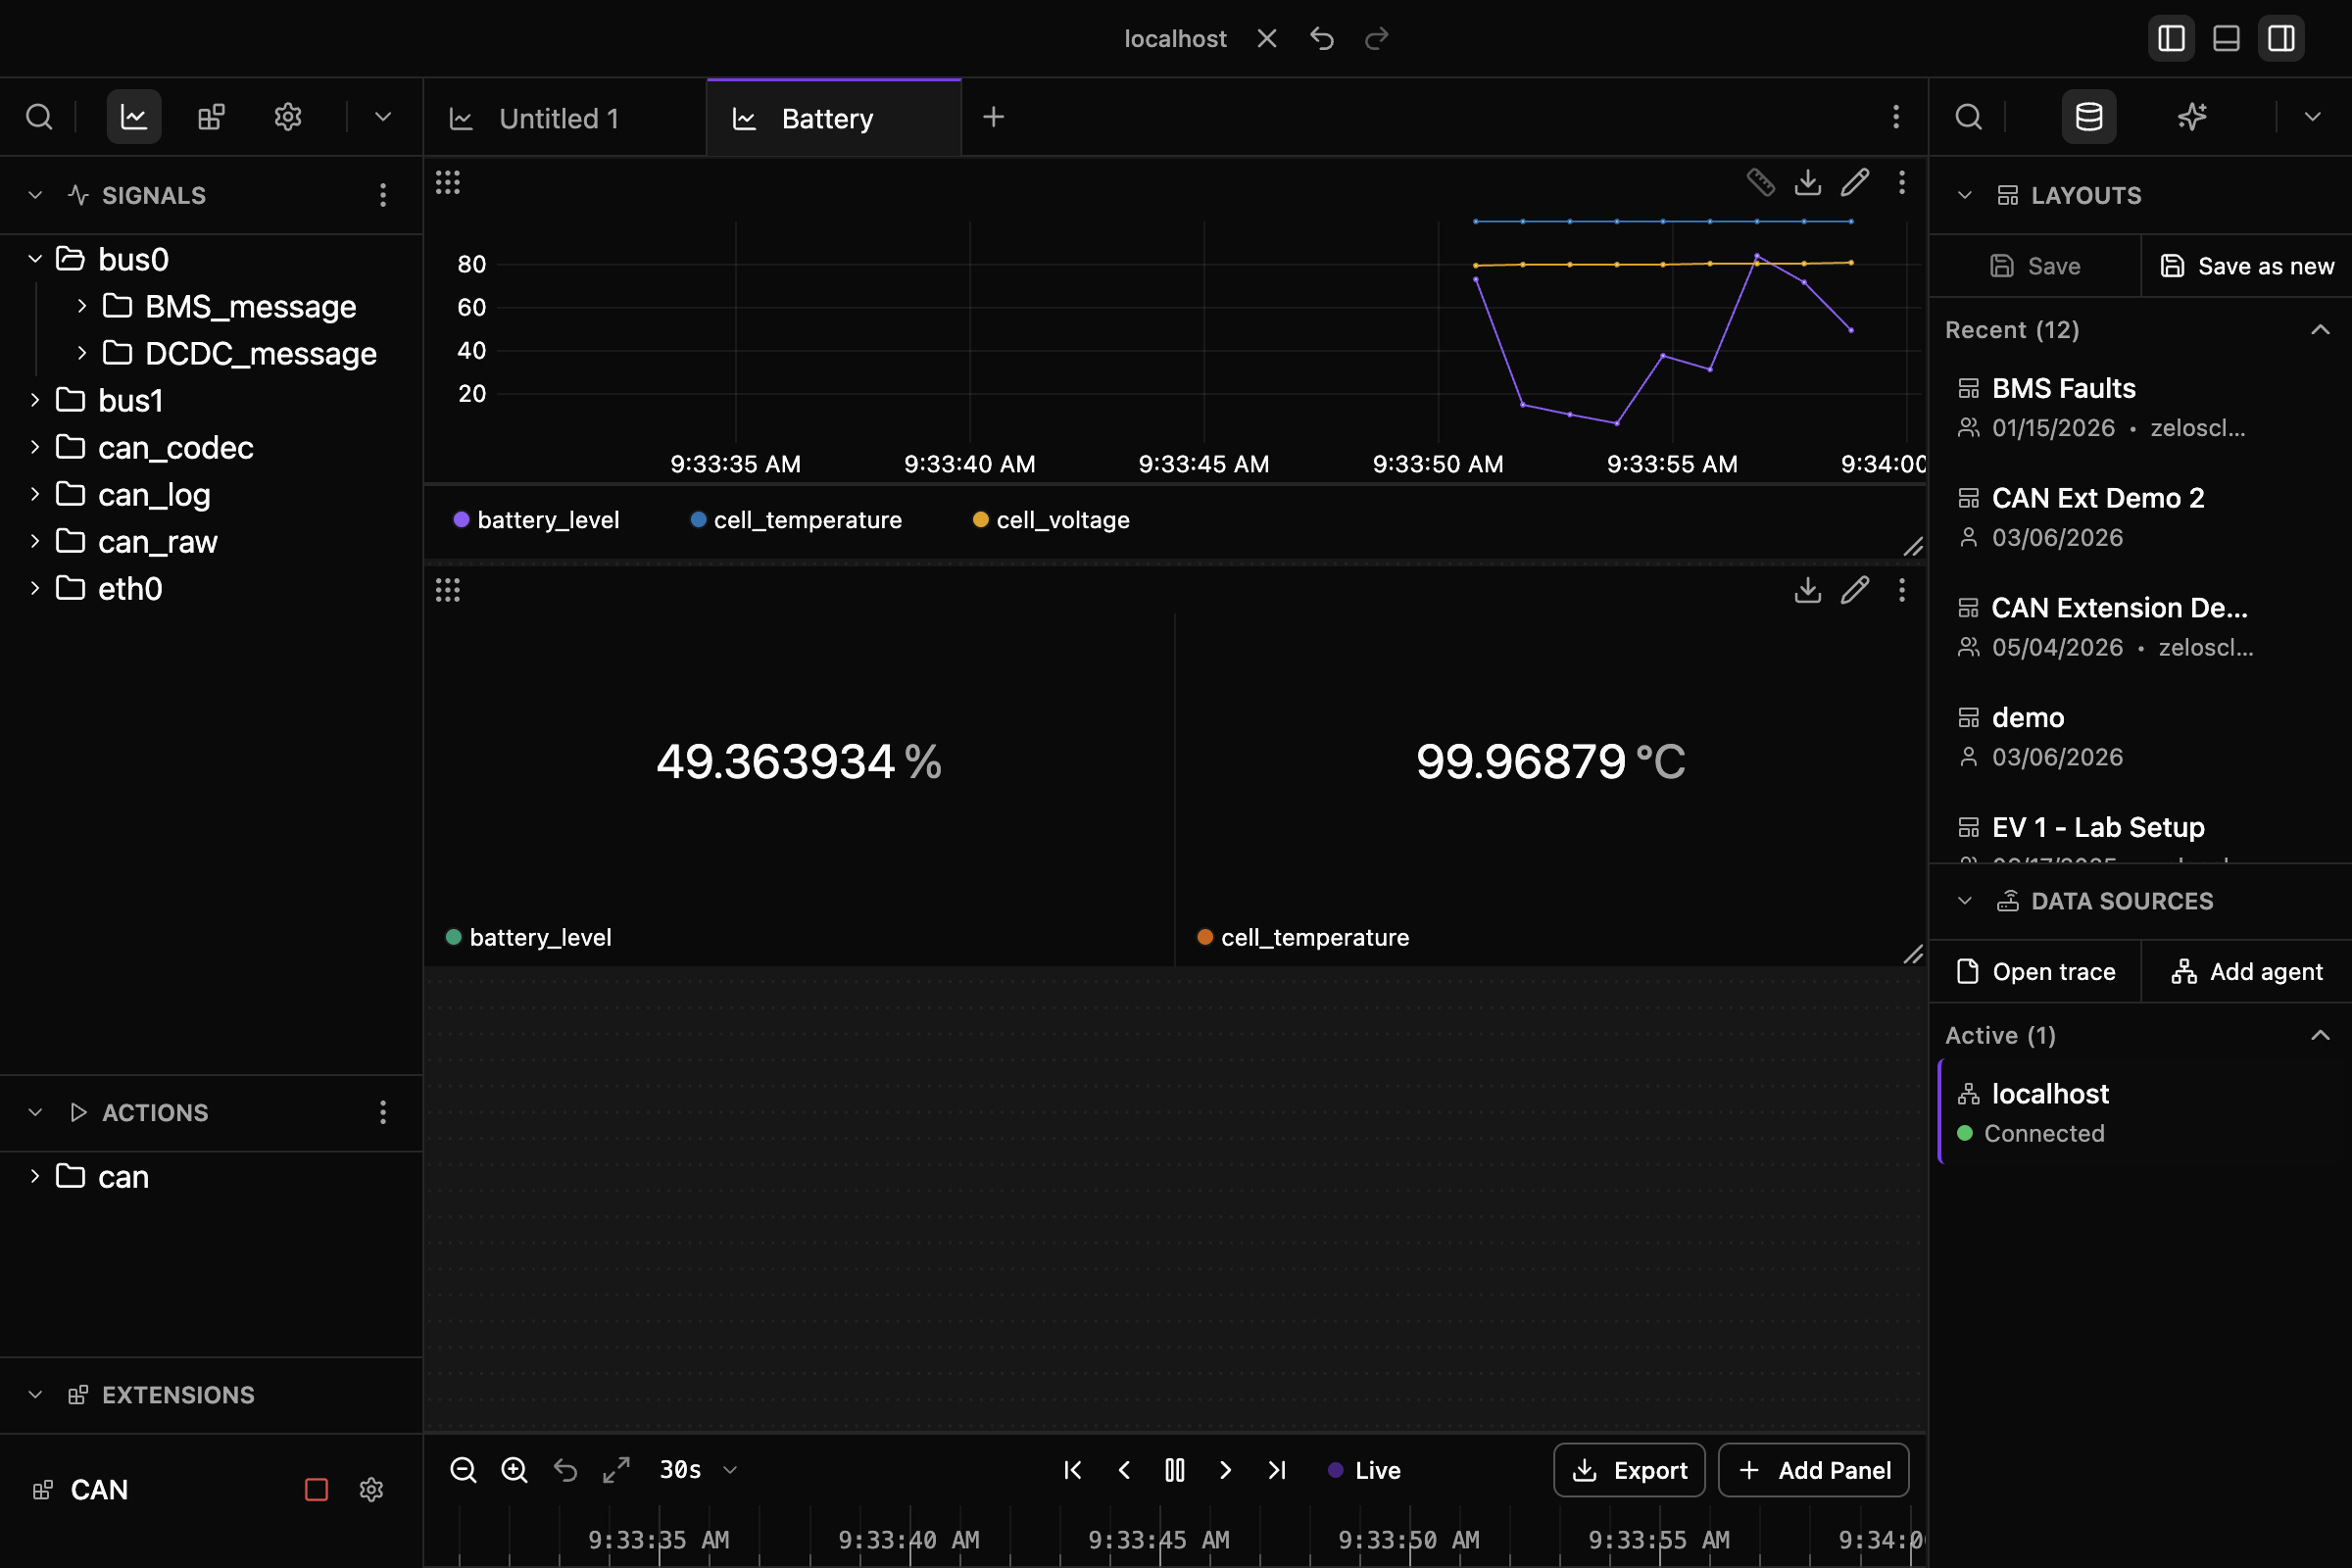
Zelos has two resizable sidebars, one on each side of the workspace. Each sidebar is topped by a horizontal rail — a row of tabs that switches what the sidebar shows. Signal trees, extensions, layouts, AI chat, and Settings are all sidebar items you can rearrange however you like.
The Rail
Every sidebar has the same rail at the top:
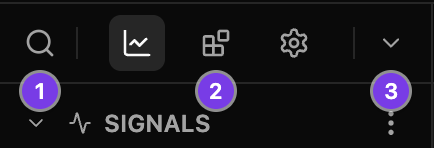
- Search (always on the far left) — filters the active view. It dims when the active view has nothing to search (for example AI Chat).
- Pinned views — one icon per pinned item. Click an icon to switch views; the highlighted icon is the active one.
- All views menu (the
⌄chevron, always on the far right) — lists every item on that side, including ones that aren't pinned or don't currently fit in the rail.
Hover any icon for its name and keyboard shortcut.
Rail Items
| Item | What it shows / does | Default side |
|---|---|---|
| Workspace | Signals, Actions, and Extensions trees | Left |
| Extensions | Installed extensions and the Marketplace | Left |
| Settings | Opens the Settings tab in the main area | Left |
| Data | Saved layouts, connections, and trace files | Right |
| AI Chat | The Zelos AI assistant — Cmd+I / Ctrl+I opens it from anywhere |
Right |
| Installed app extensions | Opens the extension in its own tab | Left |
Settings and app extensions open as tabs in the main area, and their rail icons highlight while that tab is active. Everything else shows its content in the sidebar itself.
Organizing Your Sidebars
Open the ⌄ menu and hover a row to reveal its actions:
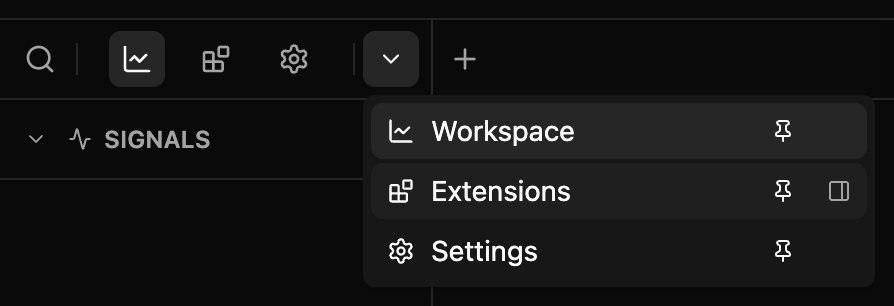
Pin and Unpin
- Pinned items get an icon in the rail.
- Unpinned items stay available in the
⌄menu only — useful for things you open rarely.
Click the pin icon on a menu row to toggle it.
Reorder
Drag rail icons left or right to reorder them. You can also drag rows up and down inside the ⌄ menu.
Order matters when space runs out: if the sidebar is too narrow to show every pinned icon, the last items overflow into the ⌄ menu. The active view always stays visible, no matter how narrow the rail gets.
Move Views Between Sidebars
Two ways:
- Drag a rail icon onto the other sidebar's rail, dropping it exactly where you want it.
- Or use the move button on its
⌄menu row.

A moved view becomes active on its new side, and that sidebar opens.
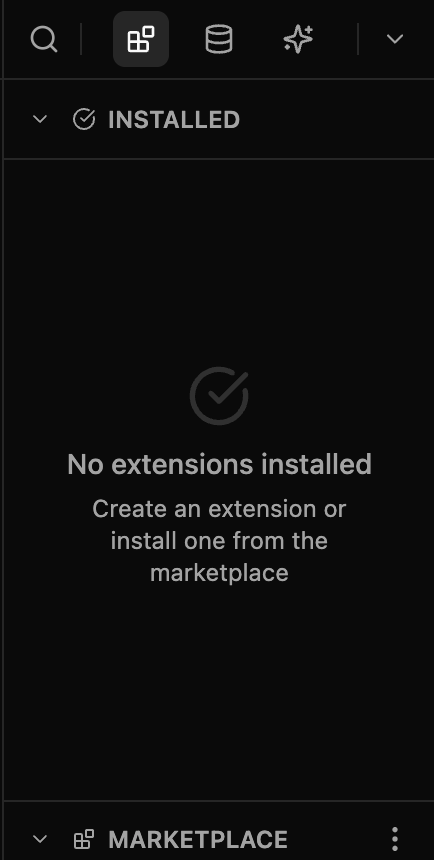
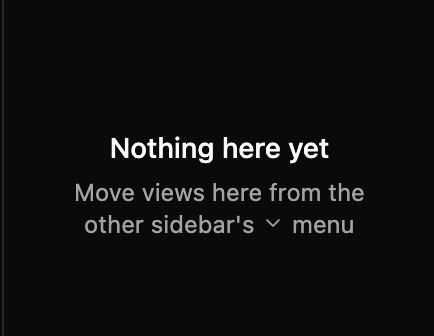
If you move everything off one side, the empty sidebar tells you how to bring views back:
Your arrangement sticks
Placement, order, pins, the active view on each side, sidebar widths, and each view's section heights all persist across restarts.
Search
Click the search icon (or press Cmd+F / Ctrl+F for the left sidebar, Cmd+Shift+F / Ctrl+Shift+F for the right) to expand the search field across the rail.
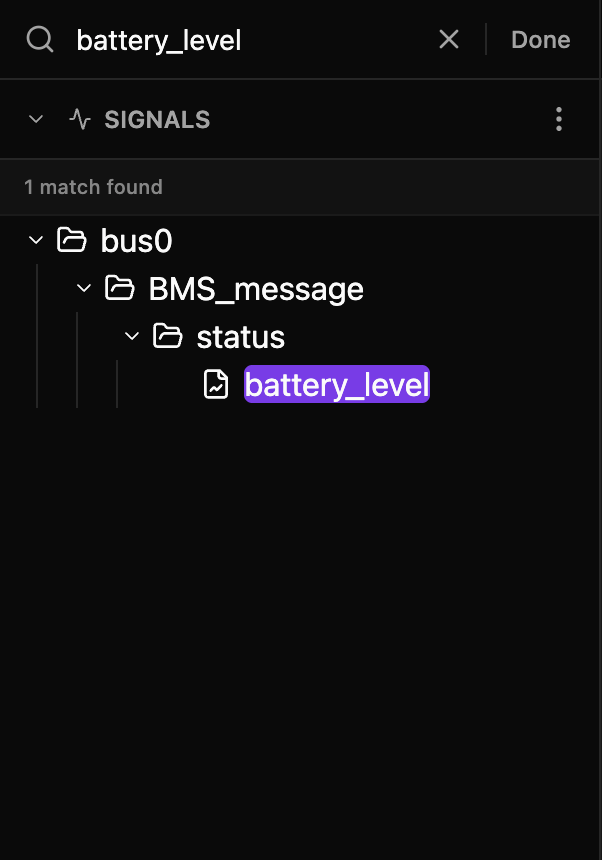
- Search filters the active view — signals/actions/extensions in Workspace, installed and marketplace extensions in Extensions, layouts and data sources in Data.
- The shortcut opens a collapsed sidebar for you and focuses the search box.
- The X button clears the text but keeps the search open.
- Done or Escape close the search and clear the filter. Switching views or workspaces does the same.
Search shortcuts are context-aware
With focus inside a Log panel, Cmd+F / Ctrl+F targets that panel's log search instead of the sidebar.
Badges
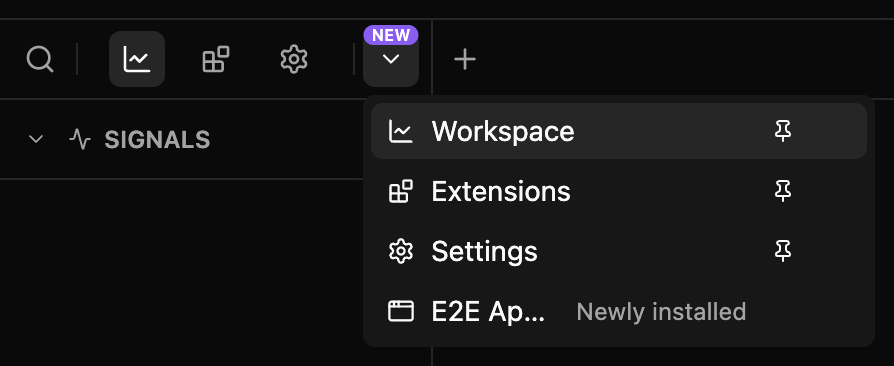
A violet NEW pill above an icon means something inside is worth a look:

| Where | Meaning |
|---|---|
| Settings | An app update is available |
| Extensions | Updates are available for installed extensions |
| An app extension | Newly installed — the badge clears the first time you open it |
Badges Always Find You
A badge never hides with its icon:
- If the badged item only lives in the
⌄menu (unpinned or overflowed), the chevron shows the pill, and the menu row spells out the reason ("Update available", "Newly installed"). - If the whole sidebar is closed, the pill appears on its title-bar toggle instead.

Resizing and Collapsing
- Drag a sidebar's inner edge to resize it; drag it all the way toward the window edge to close it.
- Double-click the divider to reset the sidebar to its default width.
- Sections inside a view work the same way: drag the divider between them to adjust their heights, double-click it to reset the split.
- Toggle sidebars from the title bar buttons or with
Cmd+B/Cmd+J(Ctrlon Windows/Linux).
A collapsed sidebar leaves an invisible grab handle at the window edge — hover it and it lights up; drag or double-click it to reopen the sidebar:

Keyboard Shortcuts
| Action | macOS | Windows / Linux |
|---|---|---|
| Toggle left sidebar | Cmd+B |
Ctrl+B |
| Toggle right sidebar | Cmd+J |
Ctrl+J |
| Open AI Chat | Cmd+I |
Ctrl+I |
| Search the left sidebar | Cmd+F |
Ctrl+F |
| Search the right sidebar | Cmd+Shift+F |
Ctrl+Shift+F |
| Close search (while typing) | Esc |
Esc |
The Workspace View
The Workspace view is home to your data: collapsible Signals, Actions, and Extensions sections. Click a section header to expand or collapse it, drag the dividers between sections to adjust their heights, and use each section's ⋮ menu for section-specific operations. Section states persist per workspace.
Mode-Based Visibility
Actions and Extensions are only visible when connected to a live agent. When working with trace files, only Signals is available.
Signals
Browse and add data signals from your connected agent or trace file.
Signals are organized hierarchically with support for nested events:
Example: robot/sensors/temperature.value
- Source:
robot - Event:
sensors/temperature(nested) - Field:
value
Visual cues: data-type icons, indent guides, full-path tooltips on hover, and muted colors for fields without data.
Adding Items
| Method | Action | Result |
|---|---|---|
| Drag & Drop | Drag item into the center of a panel | Adds the signal to that panel |
| Drag & Drop | Drag item near the top or bottom of a panel, or between rows | Creates a new panel at that row |
| Double-Click | Double-click item | Creates a new panel at the bottom |
| Folder drag | Drag a folder | Adds all items within (respects search filter) |
For signals, new sidebar-driven panels are Plot panels. If the active tab is not a layout tab, Zelos creates a new layout tab and places the Plot there instead.
Insert Between Panels
In non-empty layouts, dragging a signal near the top or bottom of a panel, or into the gap between panel rows, shows a full panel preview and shifts the surrounding panels to show the final result before you drop.
Multi-Select
| Action | Shortcut |
|---|---|
| Toggle selection | Cmd+Click / Ctrl+Click |
| Range select | Shift+Click |
| Select all visible | Cmd+A / Ctrl+A |
| Deselect all | Esc or click outside tree |
Once selected, drag any selected item to add them all to a panel. When searching, Cmd+A / Ctrl+A selects only visible search results.
Search Patterns
The rail search understands signal paths and glob patterns:
| Pattern | Finds | Description |
|---|---|---|
temp |
temperature, temp_sensor | Partial match (auto-wraps to *temp*) |
*inv*voltage* |
inverter/power/voltage_input | Multi-wildcard across paths |
motor?1 |
motor01, motorA1 | ? matches one character |
Matching folders auto-expand, a match counter appears, branches you manually close stay closed, and clearing the search restores your previous tree state.
Show Idle Signals
In Live mode, the Signals section ⋮ menu includes Show idle signals. By default the tree lists signals with recent data; turning this on also lists every signal the agent has produced and retained, shown muted, so you can find and add a signal that has gone quiet. Trace files already list their full signal catalog.
Actions
Execute commands and operations on your connected agent. Actions are organized by namespace and category. Double-clicking an action or dragging it from the tree creates a new Action panel; actions cannot be dropped onto Plot, Table, Log, or Value panels.
Extensions Tree
Control installed agent extensions without leaving the Workspace view: start or stop an extension, open its configuration, or click it to open its detail page. For installing and updating extensions, use the Extensions view.
The Extensions View
The Extensions view manages your integrations in two sections:
- Installed — every extension on this agent, with state indicators and quick controls.
- Marketplace — browse and install community extensions.
The rail search filters both sections. See Extensions for the full guide.
The Data View
Everything that feeds your screen: saved Layouts on top, Data Sources below.
Layouts
Save, load, and manage panel arrangements:
- Save updates the current layout; Save as new creates one from the current arrangement.
- Personal/Shared toggle controls visibility (you vs. your team).
- Per-layout actions: rename, share with team, delete.
- The active layout is highlighted, and modified layouts show when unsaved changes exist.
Data Sources
Your connections and trace files, split into:
- Active — currently connected agents and open trace files, with status dots (green = connected, spinner = loading, red = error).
- Pinned — sources you keep at hand; pinned items persist across sessions.
- Recent — previous connections and traces, sorted by last use, with per-item removal.
| Action | Method |
|---|---|
| Connect to agent | Click "Add agent" or click a saved connection |
| Open trace file | Click "Open trace" or double-click a file |
The rail search filters layouts (by name, creator, ID) and data sources (by address, filename, ID) together.
Next Steps
-
Visualize your signals
-
Install and run integrations
-
Preserve your setup