Extensions
Extensions are the primary way to connect your devices and systems to Zelos. Built with the Zelos SDK, they transform complex integrations into one-click installs - letting you immediately stream, visualize, and control your hardware without writing code.
What Makes Zelos Different
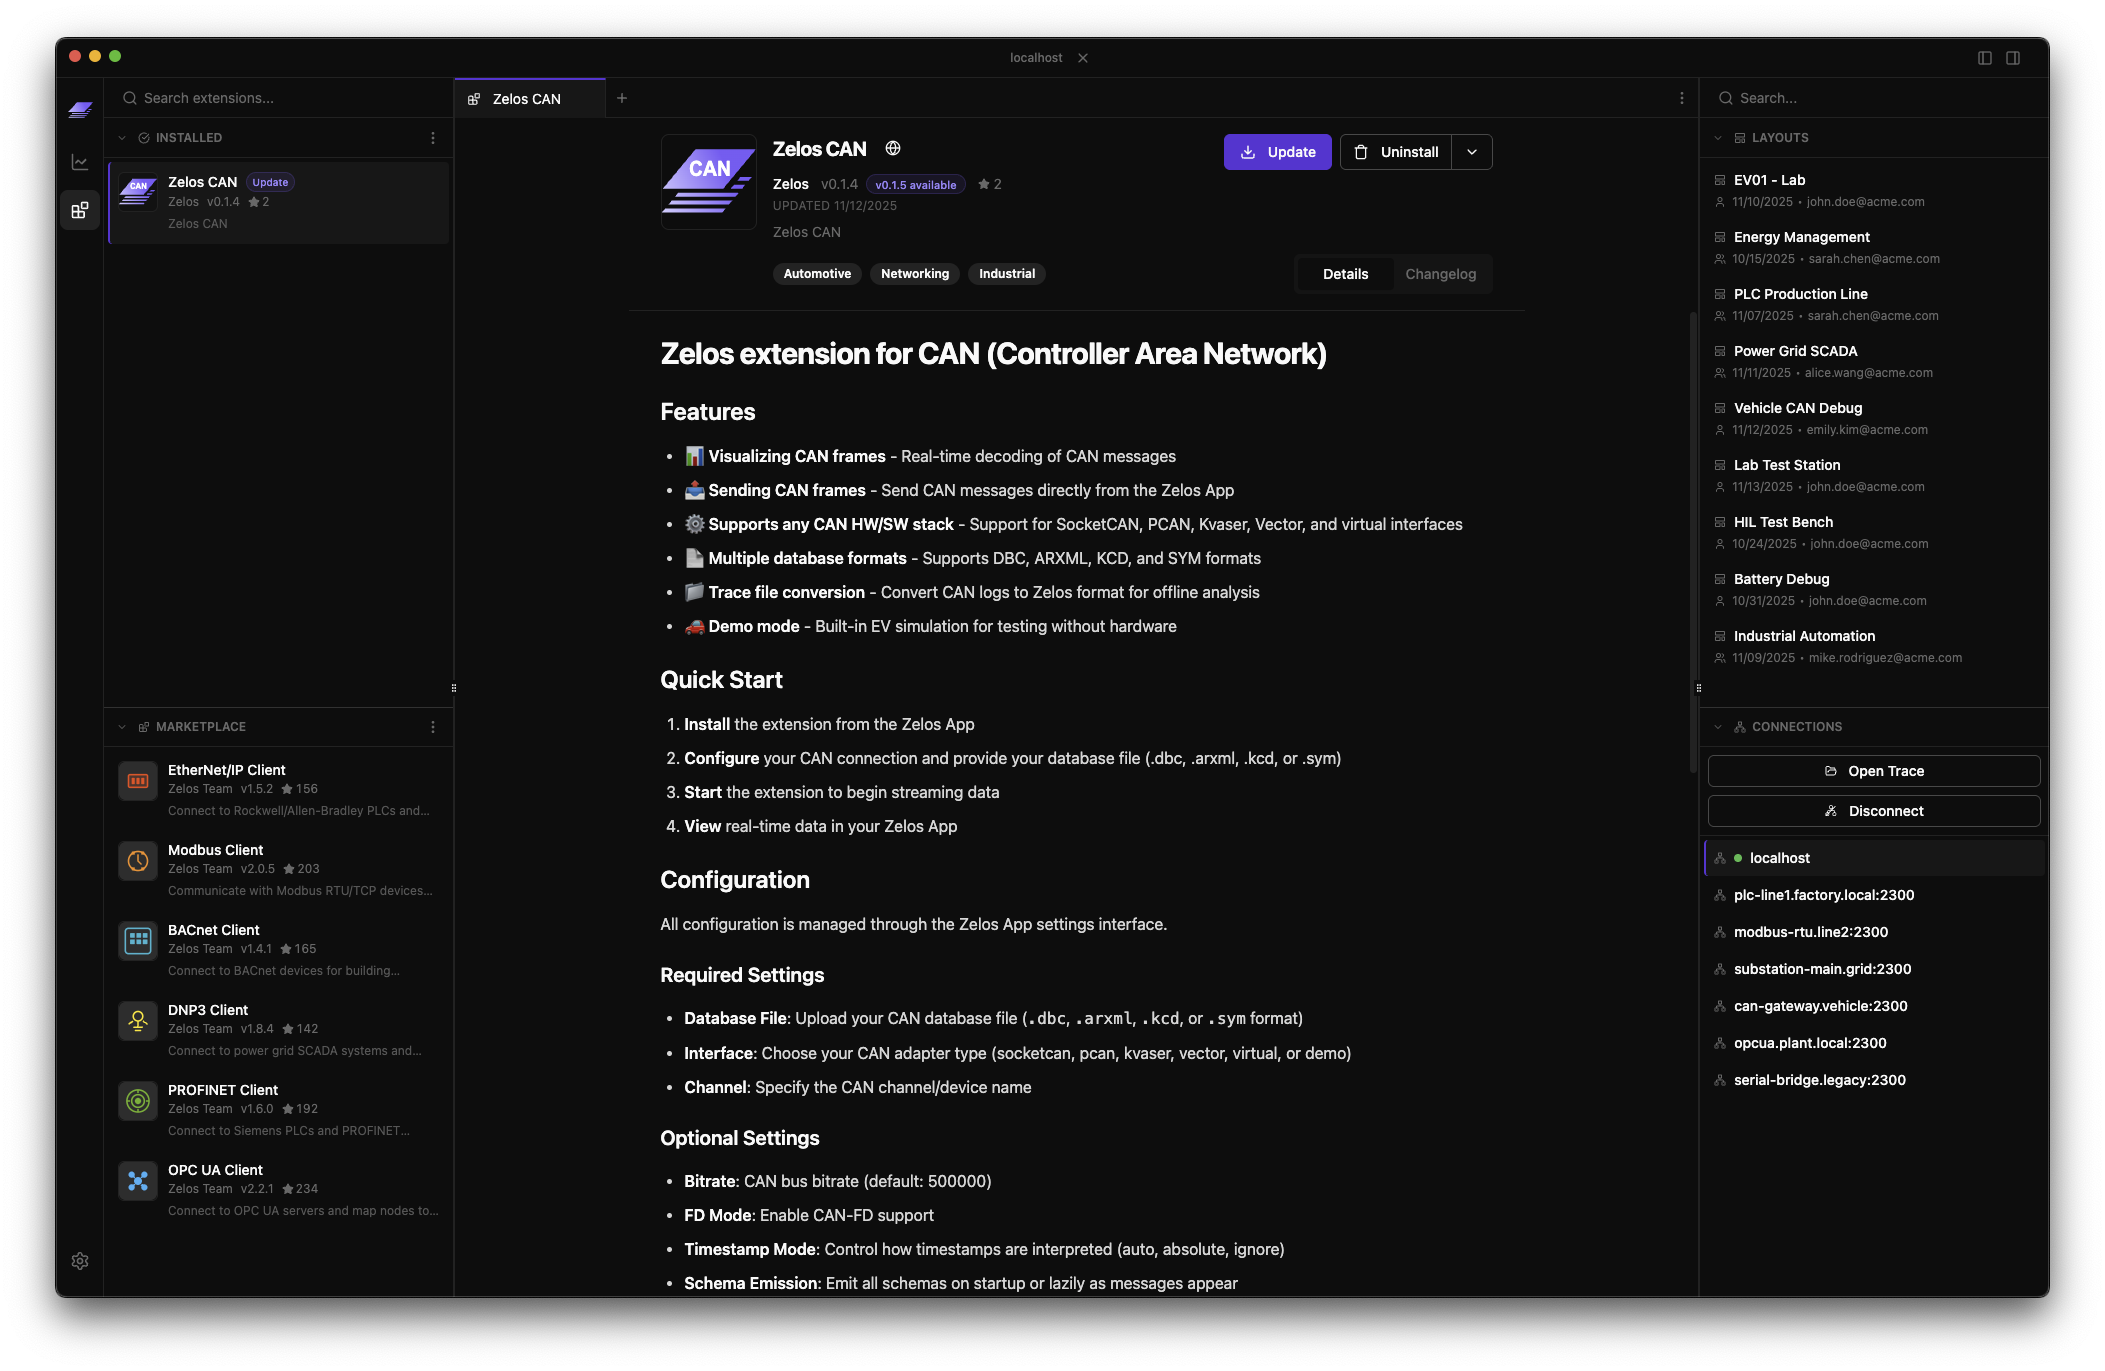
Zelos extensions makes it trivial to quickly capture data and control devices. Ex: Install the CAN extension to immediately view and send data on the bus - no custom integration code needed.
What Are Extensions?
Extensions are installable applications built using the Zelos SDK that run on the Zelos Agent and provide:
Data Acquisition
- Decode bus protocols (CAN/CAN-FD, Modbus, MQTT, OPC-UA, Ethernet/Protobuf, Serial)
- Interface with test equipment (National Instruments, Opal-RT HIL boxes, oscilloscopes)
- Stream from custom hardware and sensors
- Parse proprietary file formats and logs
Device Control
- Execute commands on hardware via actions
- Automate test sequences
- Control parameters in real-time
- Trigger hardware events from the app
Finding Extensions
Marketplace
The Extensions marketplace contains community-built integrations for common hardware, protocols, and use cases. Access it from the app rail or left sidebar.
- Click Extensions in the app rail (left edge)
- Browse Marketplace tab for available extensions
- View Installed tab for your extensions
Click the ⋮ menu in the Marketplace header to access marketplace actions:

- Create Extension - Generate a new extension from template
- Install Local Extension - Install from local filesystem for development
- Publish Extension - Submit your extension to the marketplace
Search & Filter
Search across all extension metadata:
- Extension name and description
- Author names
- Category tags (Automotive, IoT, Industrial, etc.)
- Keywords (CAN, Modbus, sensor, etc.)
Installing Extensions
Install published extensions with a few clicks:
- Click extension card to open details view
- Click Install button
- Configure if needed, then start the extension
Requirements:
- Connected to a live Zelos Agent
- Extension supports your platform (Windows/macOS/Linux, x86_64/ARM64)
- Internet connection for marketplace download
Install extensions from your local filesystem for development and testing:
- Open Extensions view
- Click Install Local Extension (Marketplace tab)
- Select extension directory containing
extension.toml - Extension installs as
local.{directory-name}
Development workflow:
- Live code reload - changes reflect immediately when extension restarts
- Test unpublished extensions before submitting to marketplace
- Modify existing extensions for custom needs
Managing Extensions
Extensions appear in the left sidebar's Extensions section when connected to a live agent.
Starting & Stopping
Start Extension:
- Click the play icon (green) on a stopped extension
- Extension state changes to "running" (red square icon)
- Extension's signals and actions become available
Stop Extension:
- Click the square icon (red) on a running extension
- Extension process terminates gracefully
- Signals and actions disappear from sidebar
Extension States
Extensions show different indicators based on their state:
| State | Icon | Description |
|---|---|---|
| Running | Red square | Extension is active and operational |
| Stopped | Green play | Extension is installed but not running |
| Error | Amber warning | Extension stopped unexpectedly (crash or signal) |
| Processing | Spinner | Extension is starting, stopping, or restarting |
Crash Detection
Zelos automatically detects when extensions stop unexpectedly (not initiated by the user). When a crash is detected:
- Toast notification appears with the extension name and exit details
- Amber warning icon displays next to the extension in the sidebar
- "View Logs" action lets you quickly open the extension log file
Exit information shown:
- Exit code - The process exit code (e.g., "Exited with code 1")
- Signal - If killed by a signal (e.g., "Killed by signal 9" for SIGKILL)
Click the amber warning icon or the "View Logs" button in the toast to open the extension's log file (extension.log) for debugging.
Crash State Clears on Restart
The error state automatically clears when you start the extension again. If the extension keeps crashing, check the logs to identify the root cause.
Configuration
Many extensions accept user configuration for API keys, settings, and preferences.
Configure an Extension:
- Click the settings icon on the extension
- Configuration dialog opens with form fields
- Fill in required settings
- Click Save & Start (if stopped) or Save & Restart (if running)
Configuration Tips
- Look for tooltip help icons (ⓘ) for field descriptions
- Required fields marked with asterisk (*)
- Invalid values show error messages below fields
Using Extensions
Once running, extensions stream data and provide controls through the Zelos SDK.
How Extensions Work
Extensions use the Zelos SDK to:
- Define event schemas - Specify signals with types and units (e.g., CAN messages decoded into engineering values)
- Stream data - Push events to the agent in real-time (e.g., sensor readings at 1kHz)
- Provide actions - Expose commands users can trigger from the app (e.g., send CAN message, reset device)
This data appears in your workspace just like data from your own SDK-instrumented applications.
Signals from Extensions
Running extensions appear in the left sidebar's Extensions section, organized hierarchically:
📁 Extension Name
  └── 📁 Source (e.g., "can_bus", "sensor_1")
      └── 📁 Event (e.g., "motor_status", "measurements")
          └── 📊 Field (e.g., "rpm", "temperature")
Add signals to panels using the same workflows as built-in data:
- Drag and drop to existing panels
- Multi-select and batch-add
- Double-click to create new panel
Actions from Extensions
Extension actions appear in the left sidebar's Actions section. Actions let you:
- Send commands to hardware (e.g., "Set motor speed", "Trigger capture")
- Configure parameters in real-time (e.g., "Update PID gains")
- Execute test sequences (e.g., "Run calibration routine")
Each action has a configuration form generated from the extension's schema, with proper types, validation, and help text.
Updating Extensions
Automatic Update Detection
The app automatically checks for extension updates:
- Every 30 minutes during normal use
- Shows update badge on extensions with available updates
- Displays target version: "v1.2.0 available"
Manual Update Check
Force an immediate update check:
- Navigate to Extensions view
- Click Check for Updates in Installed section
- Wait for check to complete
- Update badges appear on extensions with available updates
Installing Updates
Update an Extension:
- Stop the extension (click square icon if running)
- Click extension to open detail view
- Click Update button
- Wait for update to complete
- Extension updated to latest version (remains stopped)
- Start extension to use new version
Stop Before Updating
Extensions must be stopped before updating. The Update button is disabled when an extension is running.
Multi-Agent Limitations
When connected to more than one agent, some extension operations are disabled to prevent accidental modifications:
- Install - Disabled (connect to a single agent to install)
- Update - Disabled (connect to a single agent to update)
- Uninstall - Disabled (connect to a single agent to uninstall)
Extension operations that remain available in multi-agent mode:
- Start/Stop - Control extensions on any connected agent
- Configure - View and modify extension settings per agent
Managing Extensions Across Agents
To install, update, or uninstall extensions, connect to a single agent.
Troubleshooting
Extension Won't Start
Common causes:
- Configuration required - Open settings and provide required fields
- Platform incompatibility - Check extension supports your OS/architecture
Steps to resolve:
- Click extension to view details
- Check README for configuration requirements
- Open settings and verify all required fields filled
- Check extension log (click amber warning icon or find
extension.login installation directory)
Extension Keeps Crashing
If an extension repeatedly stops with an amber warning icon:
- View the logs - Click the amber warning icon to open
extension.log - Check exit information - The toast notification shows the exit code or signal
- Common exit codes:
- Code 1 - General error (check logs for details)
- Code 137 - Out of memory (SIGKILL on Linux)
- Signal 9 - Force killed (memory limit or manual kill)
- Signal 15 - Graceful termination requested (SIGTERM)
- Verify configuration - Invalid settings can cause immediate crashes
- Check dependencies - Missing or incompatible packages
Extension Logs Location
Logs are stored at <data>/extensions/<id>/<version>/extension.log. Click the amber warning icon for quick access.
Cannot Install Extension
"Extension doesn't support your system":
- Extension not available for your OS/architecture
- Check extension detail page for supported platforms
"Network error. Check connection and try again":
- Verify internet connection
- Check firewall allows marketplace access
- Try again in a few moments
"Extension is already installed":
- Extension already present in Installed section
- Update instead if newer version needed
Creating Extensions
Build your own extensions to share integrations with the Zelos community.
Why Build an Extension?
Package your integration work into a reusable extension:
- Share protocol decoders - CAN, Modbus, custom binary formats
- Distribute hardware drivers - Test equipment, sensors, actuators
- Provide workflows - Automated test sequences, calibration routines
- Build integrations - Cloud services, databases, external APIs
Extensions leverage the Zelos SDK's event streaming and action system - the same tools used for instrumenting applications.
Getting Started
The fastest way to create an extension is to use the built-in creator in the app:
- Navigate to Extensions view
- Click Create Extension in Marketplace section
- Fill in name and details
- Generated extension installs locally automatically

Follow the Extension Development Guide for more information. The template includes working examples, development tools (UV, Just, Ruff), CI/CD workflows, and everything needed for production-ready extensions.
Next Steps
-
Complete guide to building and publishing extensions
-
Learn the SDK that powers all extensions
-
Browse all available extensions online
-
Generate production-ready extension structure
-
Access and manage extensions from the left sidebar